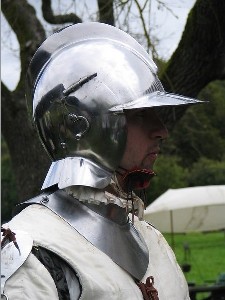
Basic Techniques
Making any kind of raised heel requires a certain amount of knowledge of cordwaining and the shoe construction process. However, they are, in essence different skill sets, and a good grounding in basic turn shoe construction is necessary to understand the process. Marc Carlson's website, Footwear of the Middle Ages, is an excellent resource in this respect, and I highly suggest that you read through at least the section on Stitches and Seams, as it describes the basic techniques that we will be using to construct these various raised heels. At the minimum, you will want to be familiar with Edge/Flesh seams, making stitching threads, and attaching them to bristles (or needles as the case may be). As Marc's website has very detailed information on those topics, I will not go into great detail on those particular points. If you have any suggestions, please do post or comment!
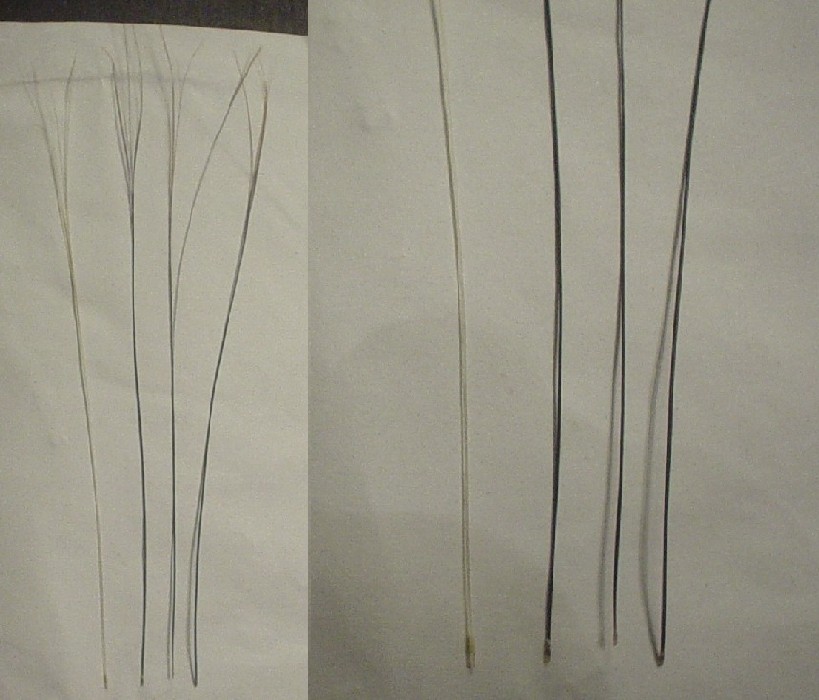
One of the essential materials in shoemaking is stitching cords, or waxed ends. This is an example of five strand linen thread attached to a monofilament fishing line. |
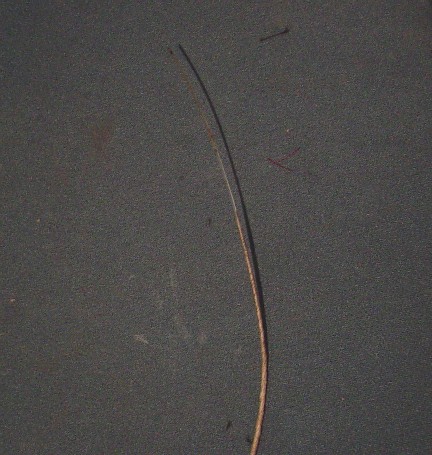 | |
A more period solution is to use boar bristles as opposed to monofilament fishing line. One advantage of boar bristles (aside from the fact that they cordwainers of old used them!) is that they have a thinner diameter, but are still sufficiently rigid AND flexible to follow the awl hole. Another advantage is that you are able to split them down the center and put the thread onto the bristle in that manner, which helps to better "lock" it in place (this is described in Garsault's 18th century text on shoemaking). It also constrats better with the leather, so you're able to see the bristle more easily (although some bristles are actually white, as shown in the picture). If you're looking for boar bristles, I can get you some, just write me! |
 | |
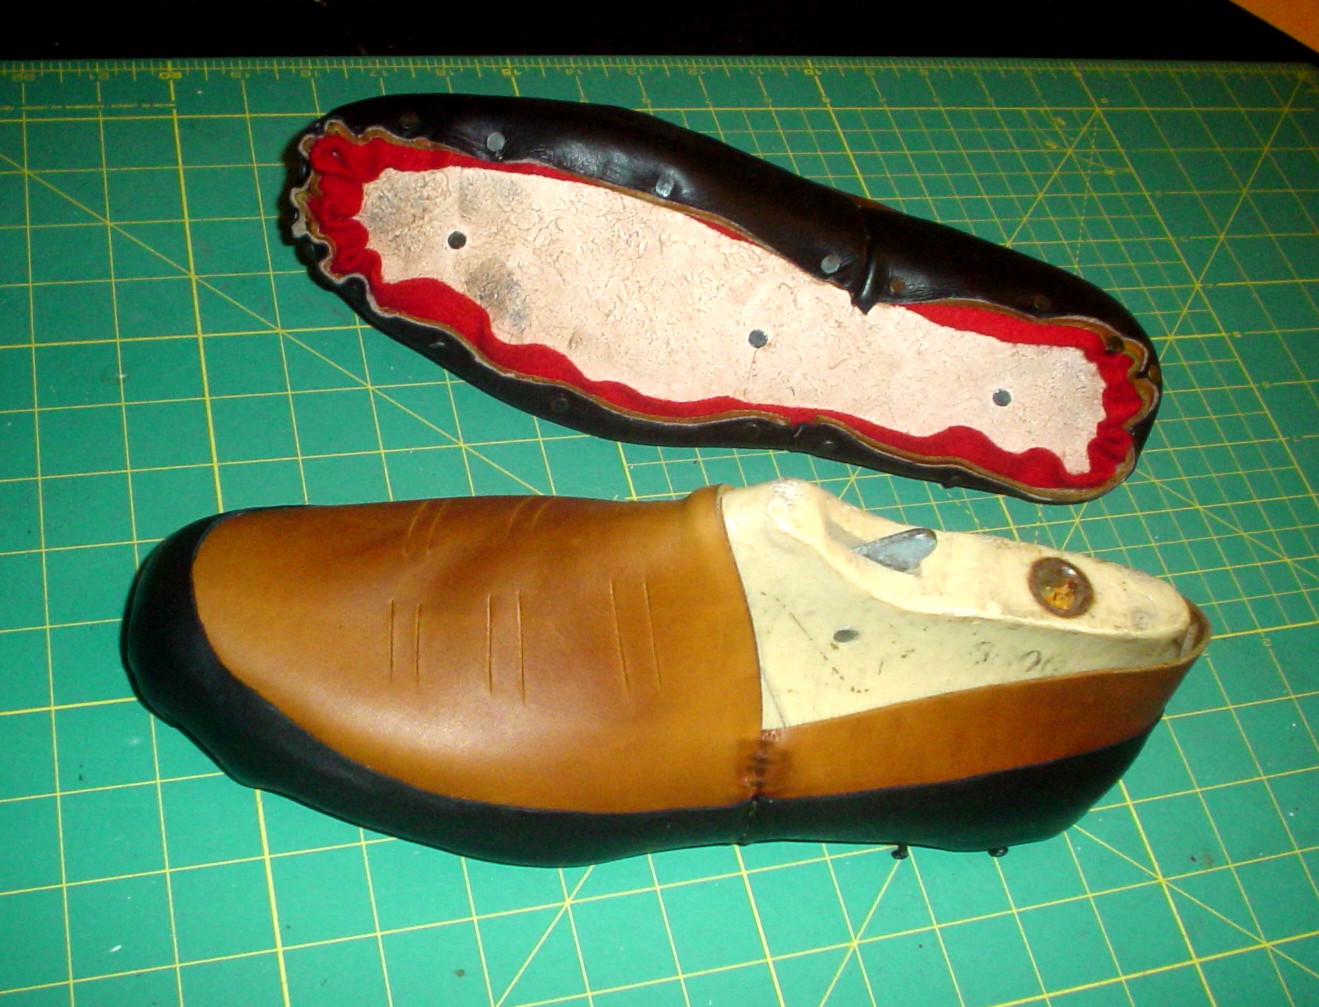
Although I mention it quite a bit, I tend to skip over the discussion on lasting shoes, since it is covered elsewhere, such as Marc Carlson's site. However, the basic concept is that after your upper has been soaked in water for the better part of an hour (I usually last after about 45 minutes of soaking), the upper is placed on top of the last and tacked to the last in order to take the proper shape. I start by lining up the wet upper properly on the last, and then tacking the toe first. For tacking, I use #10 carpet nails (since they at least give the appearance of a period nail) and an iron lasting pliers is used to stretch the upper around the last. From there, I work towards the back of the shoe, ensuring that the entire upper is well seated to the last. In this pair, you will see three layers - the first is red wool which forms a "sock," which is the word we use for a sole lining. The next layer is the upper itself (since these shoes are not lined in the upper) and then the outer black strip which forms the decorative element. You will note that the wool sock has been placed underneath the leather insole, and both tacked to the last prior to the upper being stretched around it. |
 | |
Shoemaker's wax, or coad. This stuff can get very sticky, and is intended to act as a "glue" to bind stitches tight. The wax coats the threads of the waxed end (as described in the tutorial above), and when the two ends of the cord are pulled past each other through the awl hole, friction softens the wax. When the stitch is pulled tight, the wax cools, leaving a very strong bond hidden within the shoe. There is a tutorial on making your own shoemaker's wax here - Making Shoemaker's Wax (Coad). |
 | |
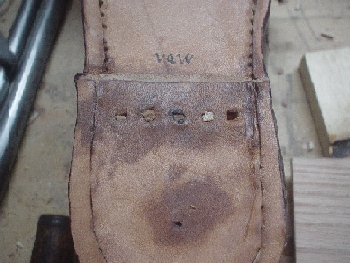
One of the most important parts of making a welted shoe is to create your stitching groove. Without it, you will end up walking on the stitches themselves, and the shoe will wear out much faster. Although there are some later 18th century shoes that are constructed with very sturdy linen strands without a stitching groove, the majority from the 16th to the 18th (and even today) use such a groove. I've put together a site specifically for the stitching groove, as it is important enough to bear its own writeup. |
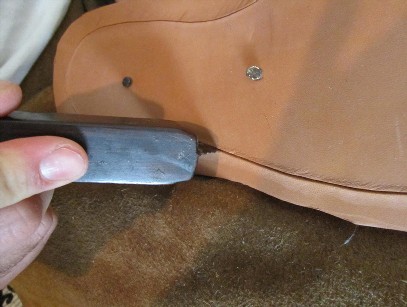 | |
When you attach a welt to a shoe, you necessarily must then attach an outsole to the welt. Normally, this outsole is a little larger than it actually needs to be, so it needs to be trimmed off at some point. I typically trim the outsole and the welt at the same time, after it has been sewn on, as shown, though there is some debate about trimming it down first, prior to stitching. You can get a bit more detail on trimming the welt here. |
 | |
An example of a pegged heel lift. You can find a tutorial on pegging a heel at: Pegging a Heel. |
 | |
Quite a large number of historical shoes have some kind of heel stiffener or support tacked into the upper, but in such a way that the sewing does not show all the way through. As such, I've completed a tutorial on Sewing the Heel Stiffener. |
 | |
This a clear example of the shoemaker's stitch passing through two layers of leather. The main idea is that you are creating a running stitch on both sides, and interlocking the threads as you pass them past each other, pulling and holding the seam tight. Although using this stitch directly through two layers of material is seldom done in shoemaking, it is shown here to illustrate the stitch itself. |
 Diagram from Marc Carlson's Website | |
If your vamp is split and you need to make eyelets, then you need to make the holes in the leather larger than those needed to get your lace through. Then, you can sew an eyelet in the same fashion as one would do for fabric. |
 Diagram from Crowfoot (164) | |
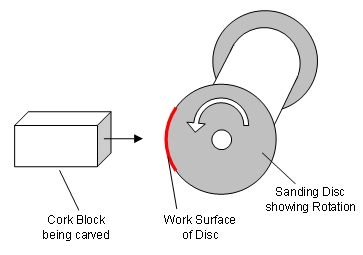
Here, I will try and give a little more insight on using a bench grinder to carve your form out. Obviously, they did not use this technique and resorted to hand tools and lots of effort, but since many of us have need of a shortcut here and there, I'd like to give a bit more detail. This particular technique is very difficult to describe, but I will do my best. When grinding, you should be facing the grinding wheel, with the rotation of the sanding disc being counter clockwise. The left side of the grinding wheel should be your work surface for 95% of the carving, if not all. Use it to "scoop" cork out of the block when you need to get a lot of material out of the way, or use it to gently "scrape" material away. Whether or not you dig or scrape all depends on the angle with which you are holding your workpiece. |
 | |