Lesson 2: Mid 16th C. Pantoufles (Cork)
Update: June 13, 2020 - I have learned a LOT in the last 14 years, and I would like to point you to a more appropriate lesson for pantofles. Just take a look at the image and trust me.
September 28, 2006 - This lesson builds a great deal on the information in Lesson 1, so I strongly suggest that you review that lesson first before reading on. In this lesson, I again use cork as the base material, but am constructing a smaller pair of pantoufles, or slippers, which were more popular in France (have to check this reference), England, and Florence, as opposed to Venice, where the taller chopines were in vogue. I worked on this project with Donata Bonacorsi, who was very handy with the tools and did the majority of the grinding and sanding. As always, if you have any questions or comments, feel free to post and comment to ask for more information.
In this project, cork was again used, except this time, the source was a little different. This time, cork in the form of a yoga block was used, and is available all over the web, and also at Yoga.com as well as The Cork Store. The downside is that they are only about 9" long. Although you can get an additional inch or so by cutting diagonally, if you have slightly longer feet, then you may need to use another source. Further, this cork block is made up of particle cork rather than cork chunks, so it is less stable, but springier and lighter. For this reason, I do not suggest this kind of cork for chopines. |
 | |
In this instance, we ended up putting our pattern diagonally across the cork to make it fit. Then the edges were knocked off and smoothed down. |
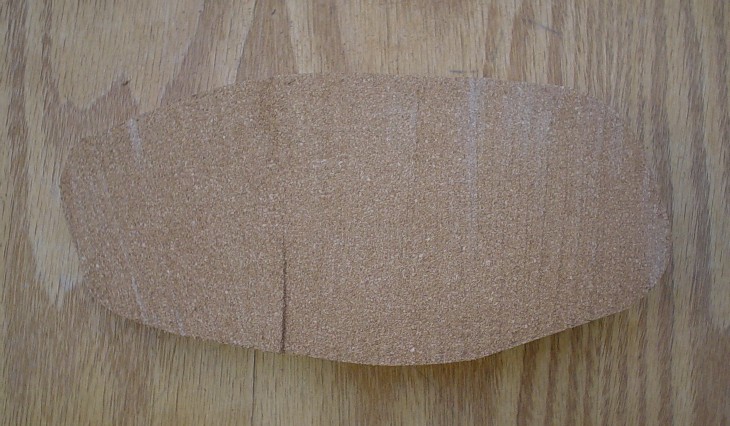 | |
The block was cut diagonally apart to make the wedge shape. You actually only need one yoga block for a pair, but you may want to get an extra block just in case. |
 | |
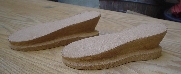
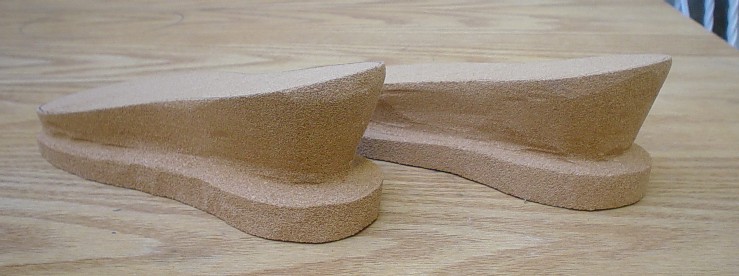
The pattern was then traced onto the sides and the top, and each pantoufle was sanded and ground down, as in Lesson 1. I've omitted the intermediate steps and give you the finished products. |
 | |
Another view of the pantoufle forms. |
 | |
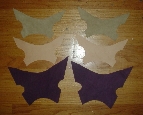
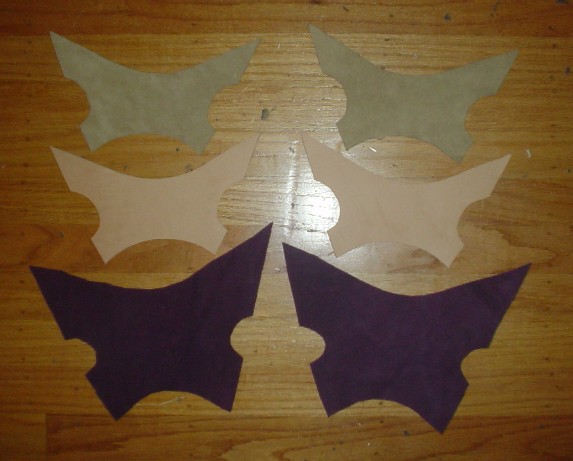
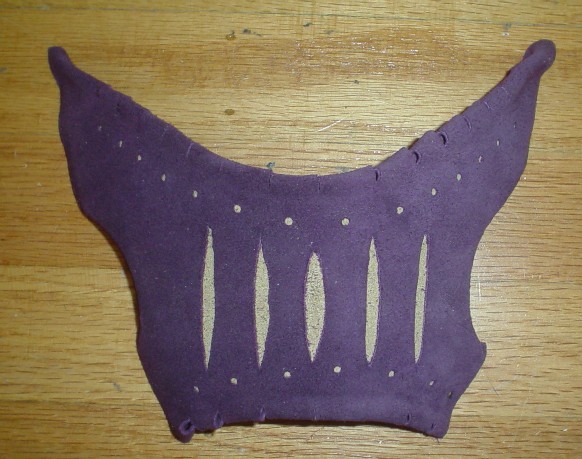
The vamps were measured and cut out. In this style, the toe is open both at the tip and on the sides as ornamentation. There are three pieces of leather shown. The base leather (in natural color in the middle), and two covering leathers, in tan and purple. The tan is glued to the top of the base leather. Then, the purple is cut and slit to allow the tan to show through. The purple is larger because it needs to be wrapped around the bottom of the vamp and stitched down, so you need the extra space. Further, we had planned to leave some room to snip little slits in the edges. |
 | |
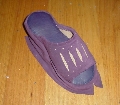
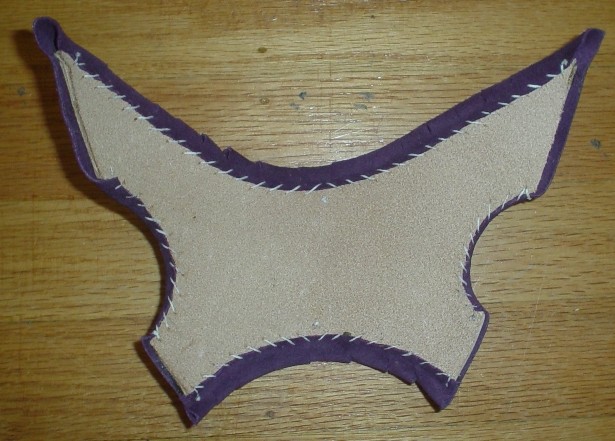
See the top and bottom of the completed vamps. Don't they look sweet? =) |
  | |
Now, I'm going to skip a lot, since we covered the same techniques in Lesson 1. Basically, we stitched the rear of the surround together (since in this case, it is better to stitch the front last), stitched the vamps and surround to the insole, and then glued the insole and surround to the form. Really, the only trick was to ensure that we had a little bit of overlap at the front so we get a nice vertical seam when we trim it down. Then, after the insole and surrounds are glued, we turn this in the same fashion as we did in Lesson 1, and end up with this. It follows directly. =) |
 | |
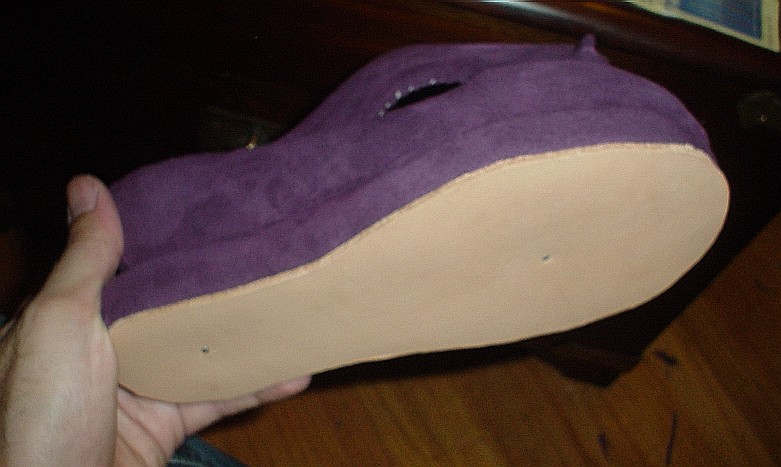
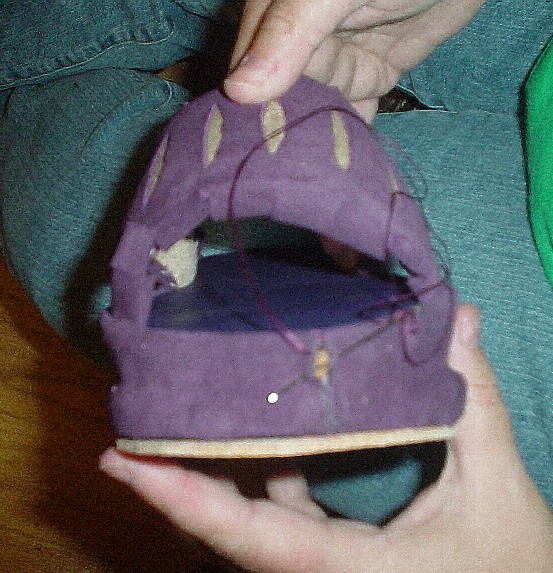
We've tucked the bottom underneath the cork and tacked it in place. Then, we've tacked the outsole to the bottom, ready for stitching. However, I made a minor error here - did you notice it? Well, we were supposed to cut the stitching groove into the outsole before we tacked it into place. So, we had to take the outsole off, cut the groove, and tack it back on. No worries! |
 | |
We stitch the front of the surround in the same manner that we did in Lesson 1. Again, the outsole was still on when we took this photo, and you would want to stitch the front before you put the outsole on. Your stitches will show a little, however. If you had gotten your patterning dead on, you could have sewn the whole thing together in advance, but I always prefer to leave a little bit of wiggle room. |
 | |
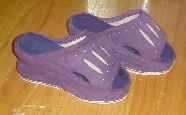
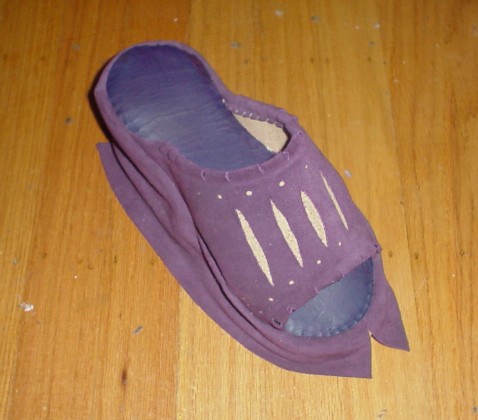
The finished pantoufles! Don't you just want to slip into them? |
 | |