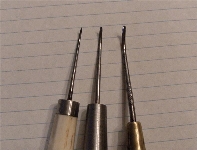
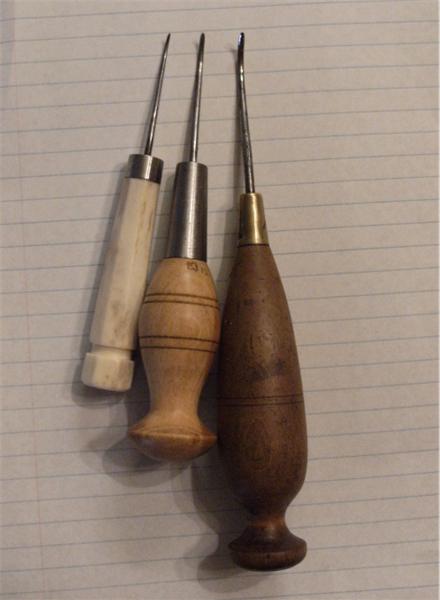
First, let me introduce you to some awls. The awl on the far left, one of the smallest and finest awls I have, is what I use to do fine work like stitching in stiffeners, adding edging or bindings, or other type of fine work on the leather itself. The middle awl is my closing awl, used to close the sides of the upper together. The largest, on the right, is the inseaming awl which creates holes for the very thick inseaming threads to attach the welt, upper, lining, stiffener, and insole together. The weight of the thread dictates the fineness of the awl to use, and for stiffeners, I tend to use two strands of 60/3 linen. |
|
A close up of the awl blades. You can really see the distinction in size. Again, I should point out that curved awls are not strictly necessary, nor do we have a large amount of historical evidence for them until later in the period, but it does produce work that is similar to the extant pieces. |

|
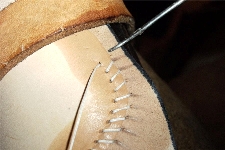
I have already cut the stiffener to shape based on the pattern, and I have thinned or skived the top edge so that there is no rough "ledge" to catch the heel when the wearer puts the shoe on. You will also notice that the working area is discolored from being wet - working the leather wet is essential to ensure that your job is as easy as possible, not to mention that you won't break nearly as many awls! When working with such fine stitches, always be sure to wet your leather, but don't go overboard, or you might leave water stains on the outside of the shoe. Just dip your finger into a bowl and dab the area (or use a sponge or paper towel). |
|
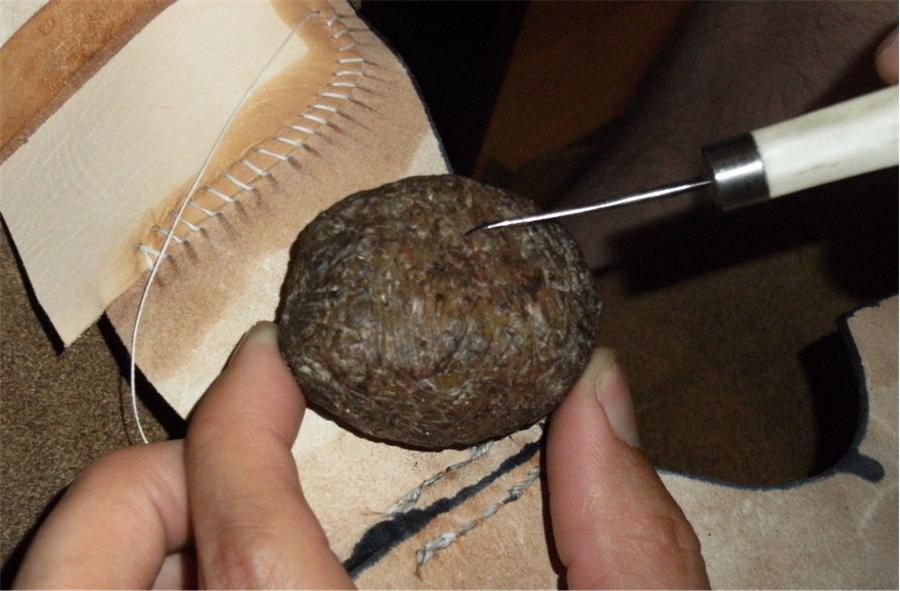
First things first - lubricate your awl! I use beeswax to lubricate the awl, but you may want to find someone who keeps bees to give you some wax. The stuff you buy in the store is too thoroughly refined, and it ends up cracking and not lubricating the awls very well. You can also use a small pouch of tallow, but that is a bit messier to work with. I typically lubricate every stitch, or, if for some reason the awl is catching or not cutting properly, I slide it out of the partially made hole, lubricate again, and finish. |
|
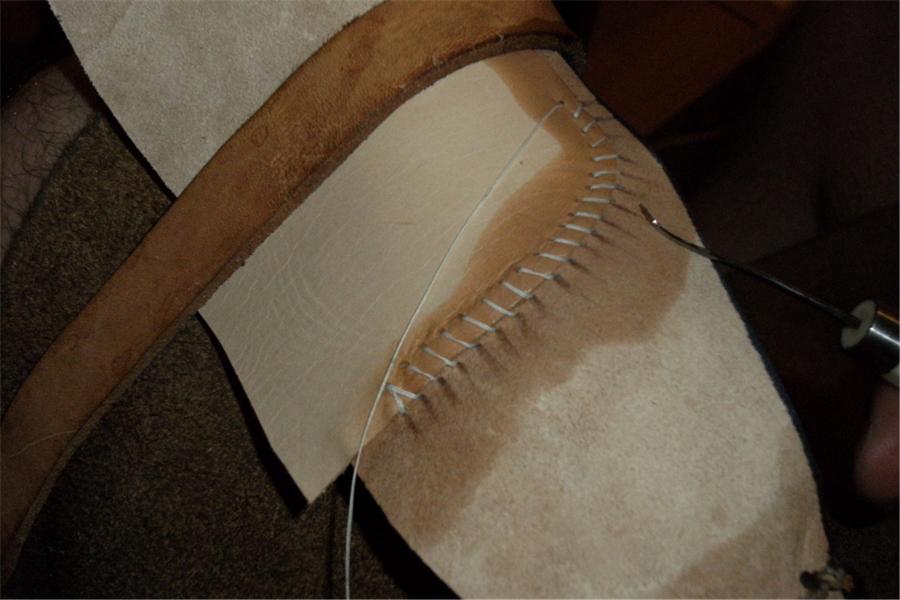
One thing that you will note is that I am using a stirrup to hold the work down on top of my closing block. This is very useful because, in the same way you use the closing block to help you close an upper, the curve of the leather will make your job much easier. Remember, you want to pierce partway through the leather and come right back up without going all the way through the leather. This is often called a "tunnel stitch" in modern parlance. |
|
Let's zoom in just a bit. Note that although you do not actually see my hands, I hold the awl in such a way that my index finger runs down the length of the blade in order to stabilize it and give me a better hold. I moved out of the way so you can see how progress of the awl through the leather. |

|
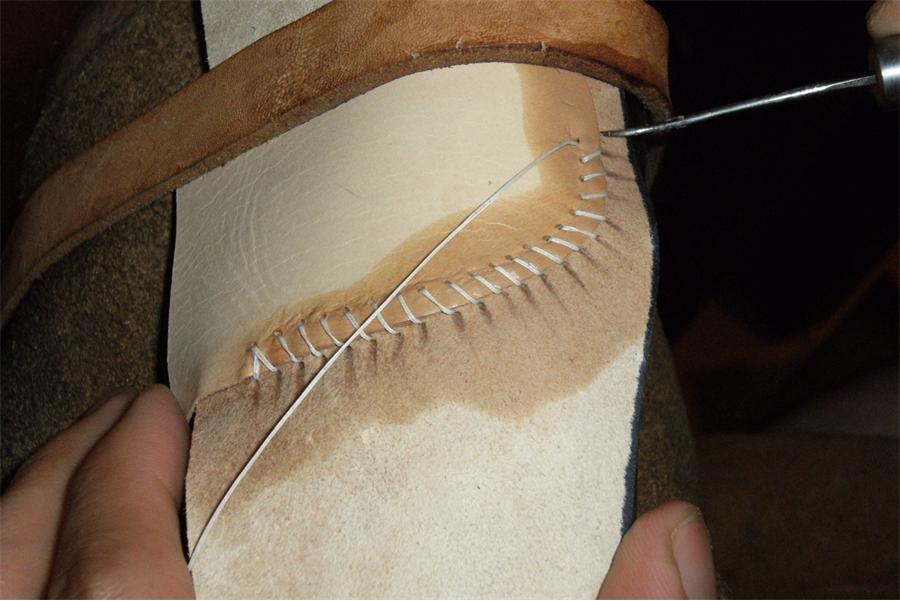
Now comes the tricky part - biting into the leather, but not too deeply, but not too shallow. Wiggle your awl gently as you push - DO NOT FORCE IT or you will break your awl! It happens to the best of us, so if you do, curse, and then get another fine awl and try again. Always try to understand what you did incorrectly so that you may learn from your mistakes. Again, if the awl seems to bind or is not making any progress, STOP. Pull the awl out gently, wiggling it as you do, lubricate it again, and try again. |
|
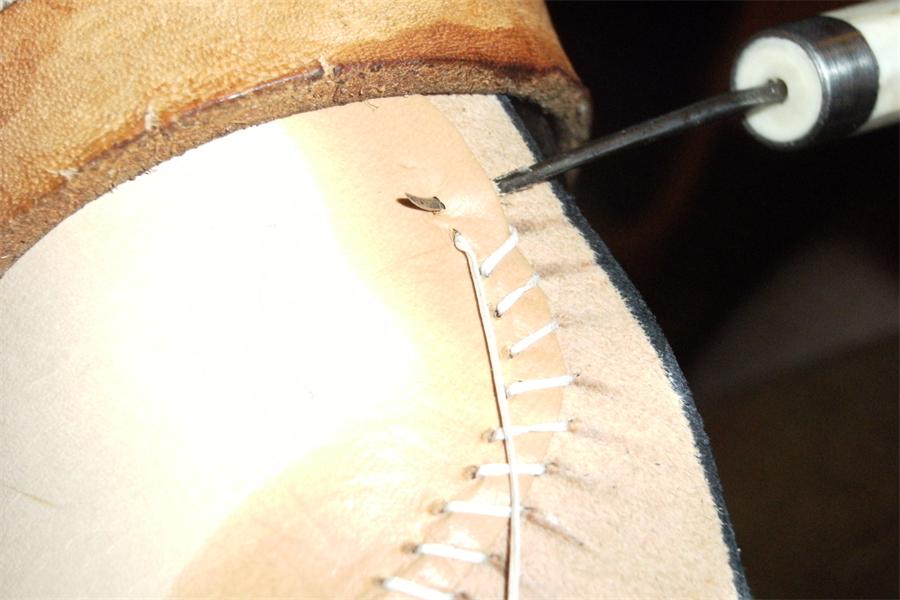
The awl will eventually make its way back up through the upper leather, and then start to pierce the thin part of the top of the stiffener. Keep wiggling as you go, and it will make a little indent into the leather, letting you know where it is about to come up. |

|
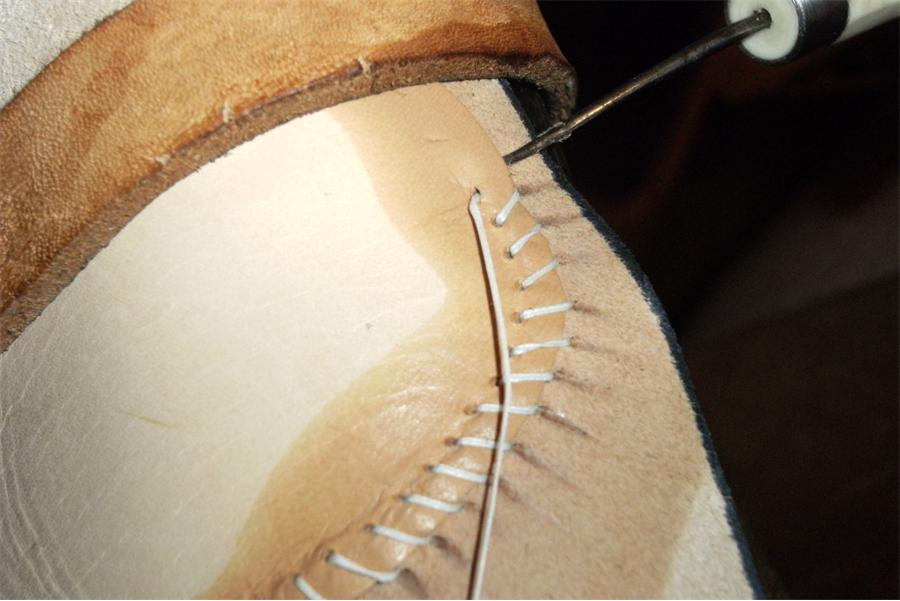
You've broken through! Take it easy, now, and push a little further, wiggling to widen the hole a bit without compromising the upper leather. Although a single stitch may seem fragile, many of these stitchs keep the stiffener on nicely, and they're very pretty too! |
|
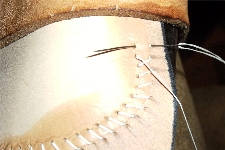
Take your needle and thread (or a boar bristle with a waxed end) and slip it through the freshly awled hole. It should slip through easily, and you shouldn't need pliers to pull it through. |

|
Pull the stitch tight, and then start again with the next one. A few words of advice - take your time. This can't be rushed, unless you've been doing it for years and years (and I have not). Be sure to re-wet the leather occasionally, and move the upper as you make progress to ensure that the curve of the closing block is helping you as it should. Again - lubricate your awl! |

|