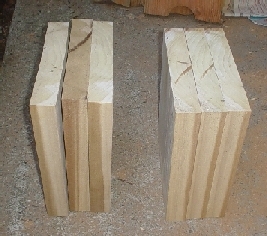
Based on my research, poplar and pine seem to be two common materials. Pine, although a bit soft, is light and inexpensive. Poplar, although a less dense than pine, happens to be harder, so I chose to use poplar instead. Unfortunately, none of my friends or
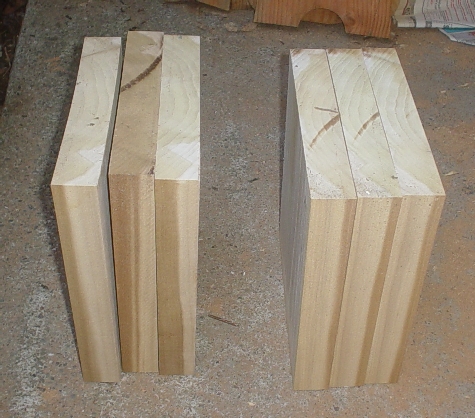
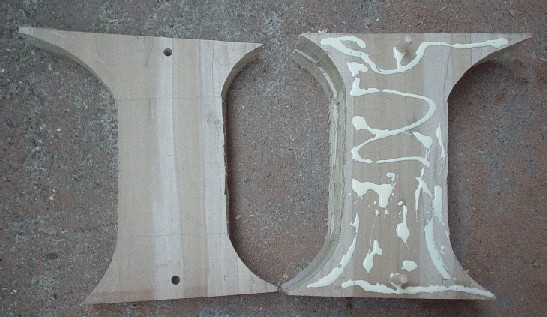
acquaintances had stumps of poplar lying around, so I had to make do with what I could find at the hardware store. As you can see, I used three widths of 1.5" poplar for each zoccolo. Notice that the grain is running top to bottom - that is simply the way that I put the blocks together before I examined the extant pieces. What I discovered was that in a several pieces, the grain looks like it runs front to back rather than top to bottom. This makes sense, as it makes the chopine more resistant to chipping from pressure and it is a great deal easier to carve in this fashion. All this, I have learned, so that you don't have to make the same mistakes! =)
|
|
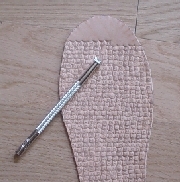
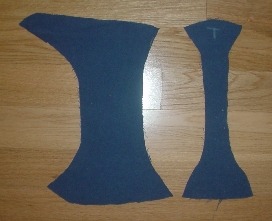
First, the outer pieces were patterned based on the pictures that I obtained from the MFA. Unfortunately, since I was only working from photographs, I didn't really know what the actual dimensions were, since I didn't have a point of reference to judge scale from. So, I did the best I could.
|
|
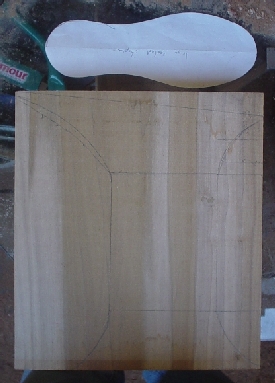
Then, each of the individual pieces were cut out in roughly the shape as the pattern. In period, this piece would probably have been carved directly from a stump, but as I'm not a terribly experienced woodworker (and the grain was going the wrong way), I couldn't use the same technique and tools. So, I had to rely on power tools to do most of the work.
|
|
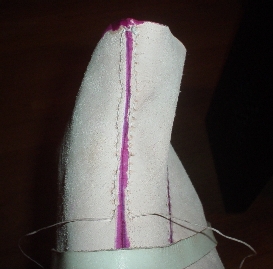
The pieces were glued together and clamped. Notice that I drilled a hole in the top and bottom and inserted a dowel through to try and ensure that they remained relatively aligned, even though I was going to be doing some sanding later. |
|
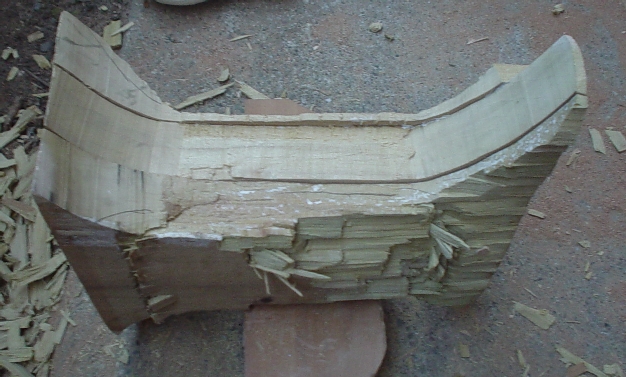
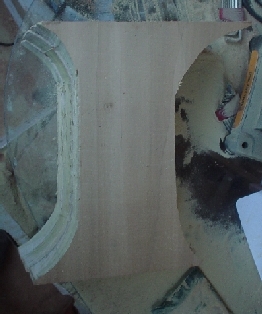
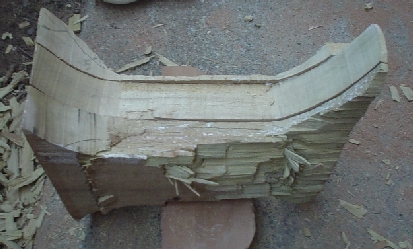
Even though I'd cut out a lot using power tools, I found it more effective in some instances to use a hammer and chisel. There are a few things to note in this photo. First, on the far side, I've carved almost all the way to the center piece. This is because I had glued and assembled the slabs before I visited the MFA. During my visit, I took measurements of the actual pieces and discovered that I was making
my replica far too thick. As a result, I ended up doing a lot of extra carving work - in fact, I ended up actually carving all the way to the center slab. So, to save yourself the effort if you're not into carving, I'd suggest cutting out just the top and bottom parts (where they are thicker) and then gluing those on. As I mentioned before, carving the piece would be a great deal easier if the grain had been horizontal rather than vertical, but hindsight always has perfect vision.
You will also notice that the zoccoli tend to chip somewhat easily if you drop them (hence the notch in the top). I had to go back and fill this in with Bondo (since I lost the piece that got knocked out) but if you're lucky, you can just tack the piece back in. I seem to recall some period reference to women chipping their chopines, but I cannot seem to track it down. Again, having horizontal grain would greatly reduce this problem.
|
|
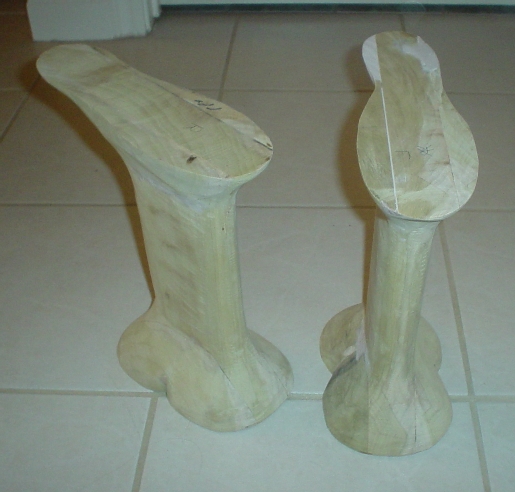
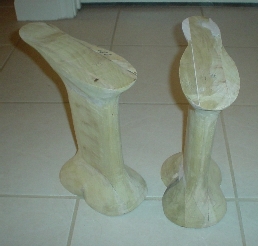
A great deal of carving, sanding, and wood dust later, we finally have the base pieces. In essence, the techniques are the same that were used for Lessons 1 and 2, except that I ended up using a hammer and chisel a great deal more to get off the big stuff.
|
|
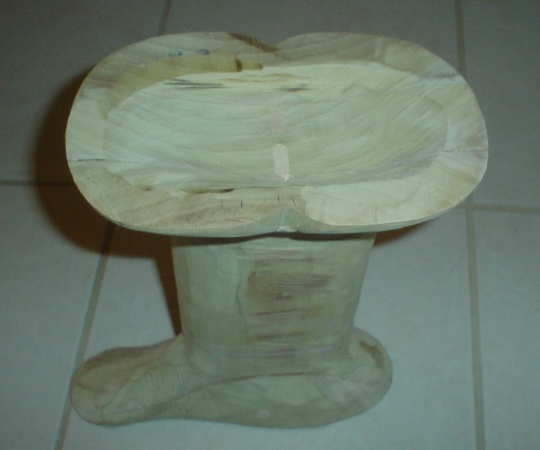
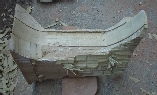
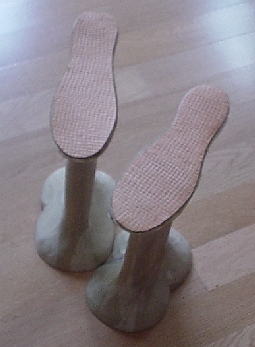
Notice how I scooped out a section in the bottom. As I mention elsewhere, I believe this was done not only to make the chopine lighter, but also to make it more stable. All said and done, each piece weighs about 2.38lb. The originals each weigh about 1.92lb. I attribute the difference in weight to the following: 1) The originals were 9.5" tall, whereas my pieces are 12" tall. 2) The center slab of my chopines is approximately 1.5" thick. The original has a thickness of ~1.25" in the center. 3) The final recipient's foot size is a size or two larger than the lady who wore the period pieces. |

|
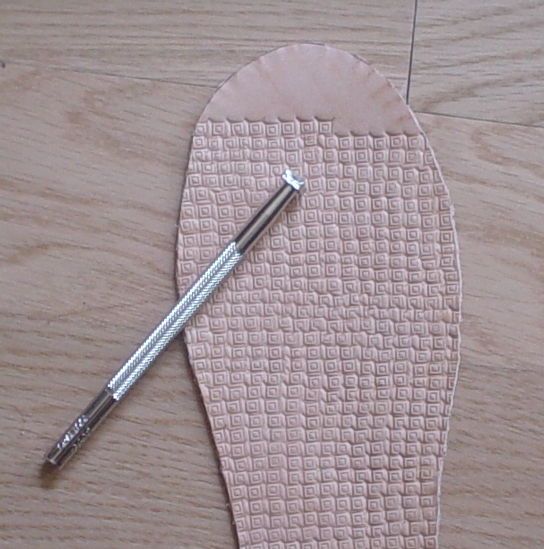
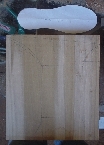
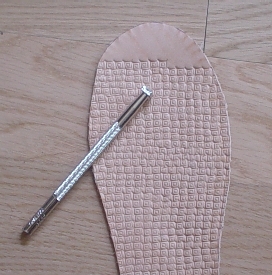
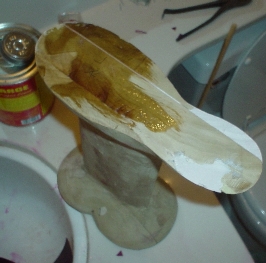
The leather insole here is shown, and I'm tooling it, as was done in many period examples. Don't forget to dye it afterwards. |
|
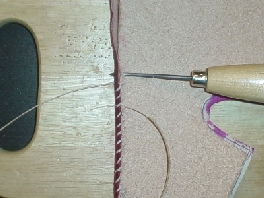
Just as with the other chopines, the stitching holes are cut through the sides in preparation for stitching them onto the surround. Notice, again, the slight border around the edge of each. |
|
The vamp cover, cut out of a much thinner leather than the vamp base, is shown here. Be sure to add an allowance all the way around so that the cover can be stitched onto the vamp without showing too much of the stitching. Here I have already cut and dyed the vamp cover. |
|
The stitches go through the edge of the vamp base and through the side of the vamp cover, and are then pulled around to form whip stitches going all the way around the visible part of the vamp. It helps a great deal if you have a glass of water handy to wet the edge of the vamp cover, because this lets it form better to the curves of the vamp base. It also helps you pull it over the edge of the vamp base. |
|
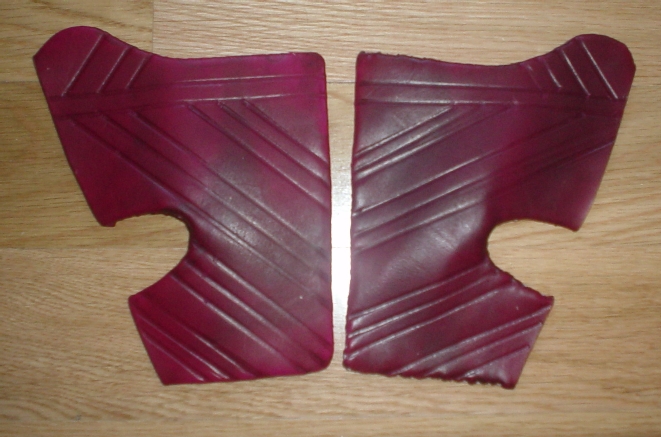
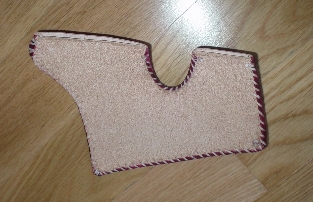
One of the vamp halves is completely stitched. Don't worry too much about having visible stitching - several of the period examples have visible stitching over the vamp. |
|
If you like, you can tool the vamp once you've sewn it on to the vamp base (or even before you've sewn it on). Many of the extant pieces have tooling on the front, so go crazy! |

|
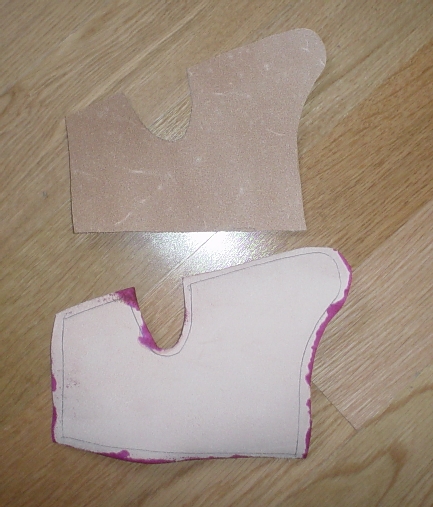
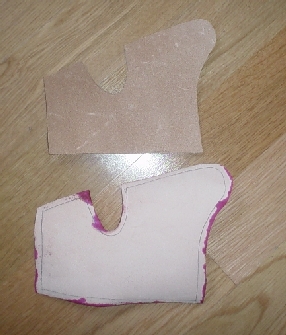
Here is the pattern for the surround that will be cut out of leather and stitched to the insole and vamps. It's important that you get a reasonably tight fit to the base, but do leave yourself a little bit extra on the back for pulling on. |
|
We've already cut the leather per our pattern and dyed it. A very thin leather, like that which was used to cover the vamps, was chosen for the surround. Now we assemble it using edge/edge stitching techniques, also called a shoemaker's stitch. We only sew the front pieces on, and leave the back seam open for wrapping around the base. |
|
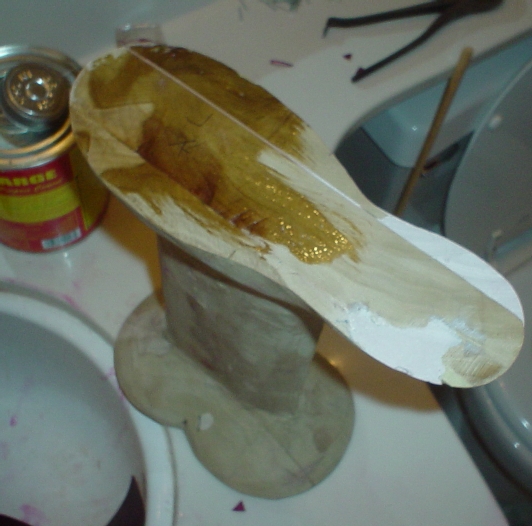
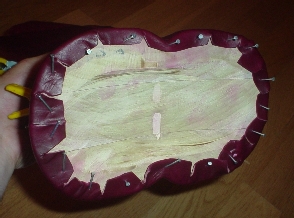
In the same manner as the other chopines, the surround and vamp is stitched to the insole. At this point, your "wrapping" for the base is all prepared. We now have to prep the base for receiving the sole. Glue is placed on the top of the base to ensure that the insole adheres properly to the top and doesn't move around. The picture shows gluing in progress. |
|
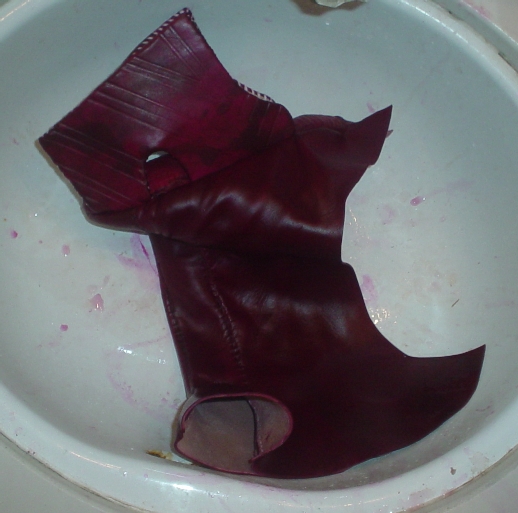
Now that the base is ready, you can wet the surround leather to allow it to take the form of the base. Don't soak it to death, but definitely get it wet and flexible. |

|
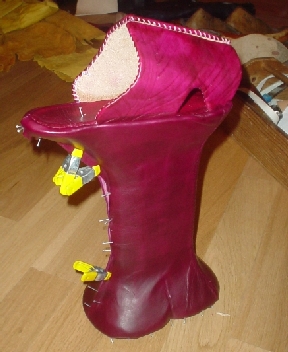
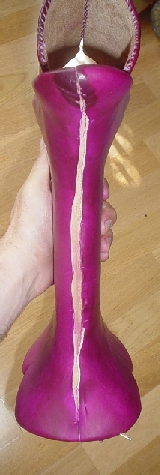
The trickiest point, and you will get dye on your clothes and hands! I'm afraid that I couldn't take too many photos while I was fitting the surround to the base, but the hope is that those of you experienced in cordwaining have an idea what is involved here. The surround is pulled on over the base and then tugged tightly from the back and bottom, and then nailed into place. In many places, you need to smooth the wet leather out to have it take the shape of the base. I've tacked and used mini-clamps to help hold the leather tight and give it as close a fit as possible. I've also put some nails in the sole to try and keep it in place. |
|
A picture of the underside of the surround, showing tacks holding the surround down. Note where I have cut triangular slits in the surround in order to help it take the shape of the base more closely. This is apparent on an example that I examined in the MFA, and it makes good sense. |
|
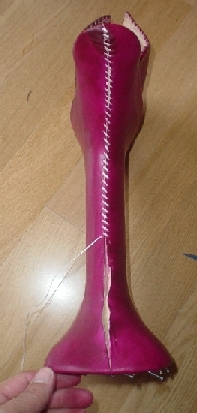
This shows the surround wrapped around the chopine with the tacks and clamps removed. The small darker spot shows an area that I wet again to get a smoother fit to the base. It's now prepped to be stitched closed.
|
|
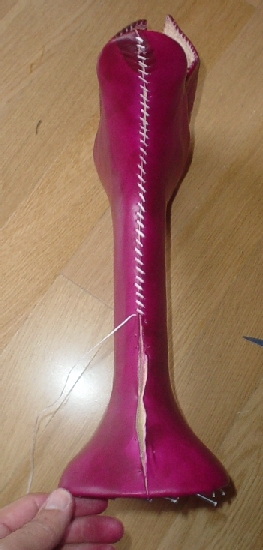
The surround is being stitched closed. I had to trim some excess from the edge in order to get them to meet firmly. Note that I'm using a whip stitch to join the two sides. Period examples have either a very coarse running stitch or a very coarse whip stitch, even coarser than what I've used here. It's hard to tell, however, if this is original to the piece (since it was linen, it might have decayed) or if they were attempts at conservation. In any event, it will get covered up with braid. |
|
The next picture follows directly, or so they say (for those of you who don't get the joke, I'll fill you in: often times in mathematical proofs, they will skip a sufficiently complex arithematic computation and arrive at something very different, by using the hand-waving argument of "it follows directly"). I've left out the stitching of the sole to the bottom, since we've already done that in a previous lesson. What I do want to mention here is that the period example shows the awl holes going through the wrapped-down leather on the bottom, through the wood, and then back through the surround. I thought that I would have an issue with breaking the wood as I went, but it really wasn't a problem at all. One thing that I probably would have done differently is to make the stitching much finer - my stitches were probably 1/3 or 1/2 again as large as the period examples were. Note that some of the braid is now attached to the chopine.
|

|
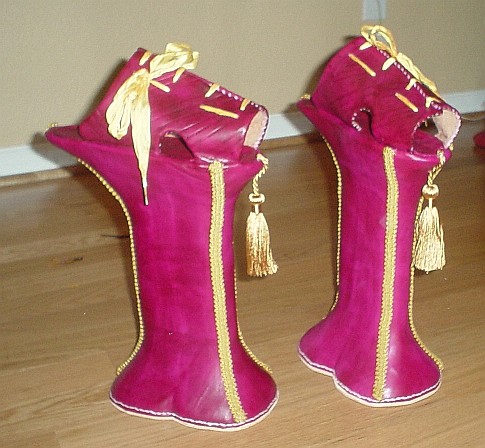
They're done! After cutting some holes in the vamp, threading some some doubled-up silk ribbon with aglets and adding the tassels, the chopines are complete. All in all, a very good attempt. Doing these again, I would have changed three things: 1) The stitching pitch on the bottom. 2) The base should be wider and look more like two overlapped circles rather than a horseshoe. 3) The vamp is a little large compared to the period examples. Otherwise, it's quite a decent piece, and the pictures really do not do them justice. If you were wondering about how difficult it was to actually walk in these...well, rather difficult =) Several ladies wore them, and all agreed that on reasonably flat surfaces, it was not too much trouble, but when it came to thick grass or unlevel ground, they were very difficult to walk in.
|
|