Lesson 8: Late 16th / Early 17th C. Heels (Timber)
June 13, 2011 - I've been itching to make a pair of heels inspired by the whitawed pair in the Ashmolean museum in Oxford, and I finally made my attempt as the result of a happy coincidence - I promised a pair of shoes to the lovely Sarah Goodman (of http://www.modehistorique.com fame), and she was keen on a pair of late 16th C. heels. I'm rather pleased with the results, although I made some departures from the actual pair. Without being able to examine the heels in detail and only having second-hand descriptions of how the shoes were constructed, I used some knowledge from later centuries in my attempt.
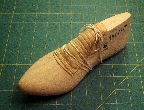
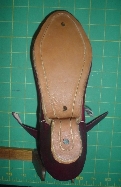
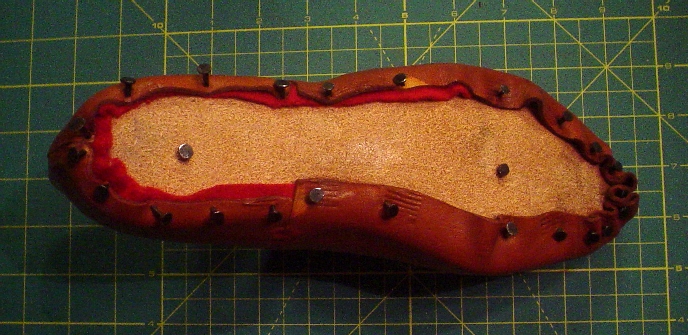
A picture of the inspiration for this project. These shoes are whitawed leather, with no apparent lining. They are quartered, meaning that the portion that covers the heel of the shoe is made up in two sections (as you can see by the seam down the back of the left shoe). The leather is fairly light-weight tawed leather, and they are constructed suede side out, meaning that the grain of the shoe is on the inside (which makes sense why there was no lining). They are also made on straight lasts (instead of lefts and rights), and the upper edge is folded down and tunnel stitched, likely to reinforce the thin leather. To the best of my knowledge, based on research from Queen Elizabeth's Wardrobe Unlocked, as well as Swann, Goubitz, and other illustrations and paintings, there is very little evidence in Europe before the 1580s for shoes with a bona fide top piece, or heel, constructed as these are. Wedges and other "platform" types of shoes were well known, however. Based on the pictures, and the extant shoe that is "cut away" on the right, it appears that these shoes are fully lasted, meaning that they are inseamed all the way around. |
 | |
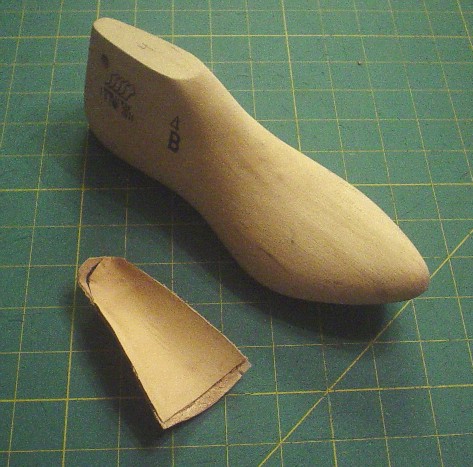
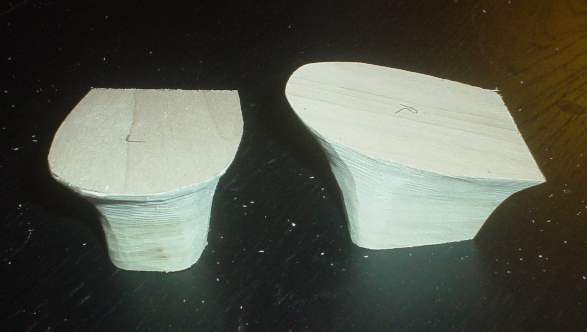
Thanks to the generosity of the shoemakers at Williamsburg, I was able to obtain a straight lasts of appropriate size. Although these lasts are intended for footwear from the 18th C., the profile is close enough for me to justify their use for these 1600s shoes. This shows the last itself (note that there is only one) and the shover. When a last like this is carved, it is done in such a way to require the use of an extra piece of material on top, the shover. The shover is placed on the last, and the shoe is lasted and sewn. Then, the shover is removed and the last can be pulled out of the shoe. Modern lasts are "breakaway" types, and the heel of the last bends upward to allow the last to be removed. |
 | |
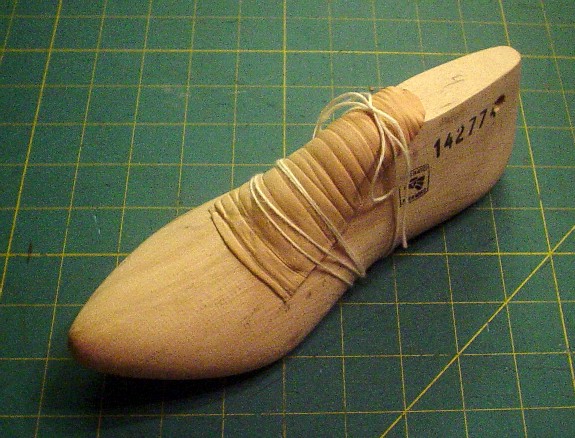
The shover tied in place. When the shover was constructed, I used cording to tie it to the last and retain its shape - I will probably use ribbon or something flat for the next time so as to avoid the unsightly ridges down its surface. |
 | |
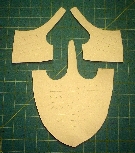
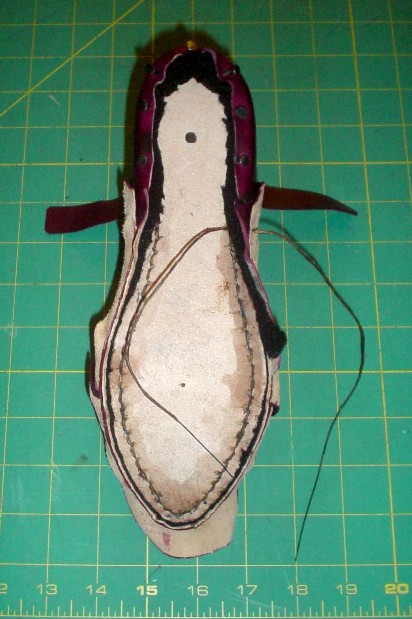
A shot of the upper. Note that I did not have a zig-zag punch to do the cuts with, so I simply made straight cuts. I also made the small diagonal cuts much deeper than the long, straight scores which were just on the surface. |
 | |
It occurred to me that I have never actually shown a lasted shoe! Mea culpa - here is a shot of the lasted shoe. The color is a little off, because this was actually a second pair of shoes I made similar to this one, but had forgotten to take a photo on the first pair. |
 | |
It was also pointed out that I had never shown the carved heels, so I provide them for you now, with one huge caveat. I detest the use of complete capitalization, but here, it is warranted. REMEMBER TO CARVE A HEEL CUP INTO YOUR HEELS! The pictures here do not show the heel cup carved into the heels, and I ended up having to cut one heel out of the shoe to re-carve it. The heel cup will make it incredibly more comfortable for the wearer. |
 | |
We now skip ahead to a partially inseamed shoe. Note that this is the first time that I've inseamed with bona fide shoemaker's wax, made of pitch, rosin and beeswax (instructions are here for creating your own wax). It is a bit more difficult than the previous waxes that I've used, but once you get more acclimated to it, it really does make a difference. The bonds hold much more tightly and "glue" themselves together quite admirably. |
 | |
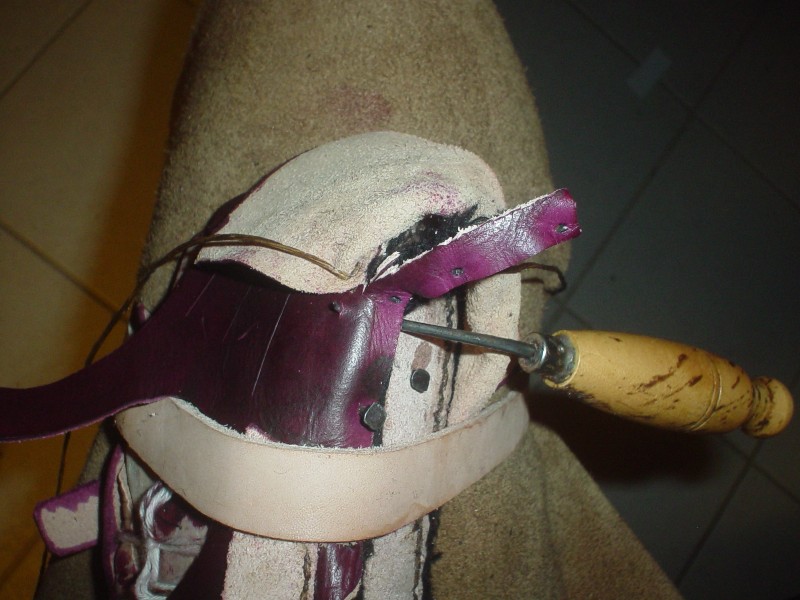
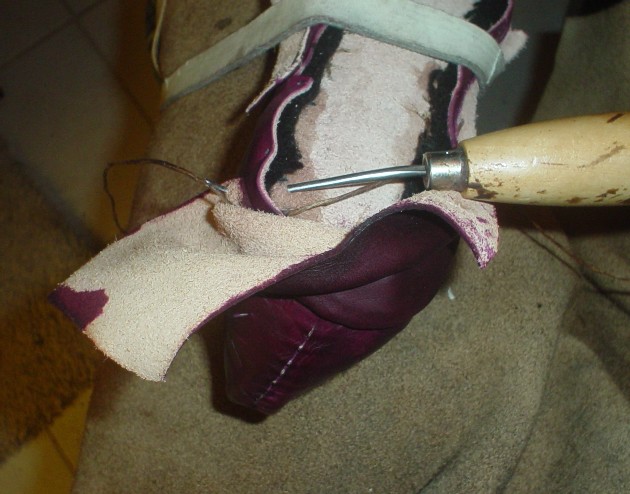
Now comes the most interesting part - the heel cover. Is it unclear from the photographs of the extant pieces how the heel cover is constructed in the Ashmolean museum. Some 17th C. mules like that in Lesson 6 show a heel cover split up the back and then stitched together afterwards, but as I expect to be making some 18th C. heels in the future, I thought I might try it without a back center seam. The heel cover is kind of a very thick "flattened C" shape in order to properly cover the heel, and it needs to be cut well so as to completely cover the heel without too much excess material. As you can see, about half of heel cover is sewn in place without too much effort. Note that the heel cover has been throughly wet so as to allow better flexibility during this process. |
 | |
As you continue to sew, you can no longer pull the upper edge of the heel cover into place without forcing the rest of the cover to fold. So, one has to do the best one can. Note that I have turned the shoe around so it may look a bit different from the previous picture. |
 | |
You should be able to get about 3/4 of the way there with just a small fold in the material. |
 | |
At this point, you must turn down part of the heel cover to be able to continue to sew it down. It may take a bit of tugging and arranging, which is precisely the reason it needs to be wet. |
 | |
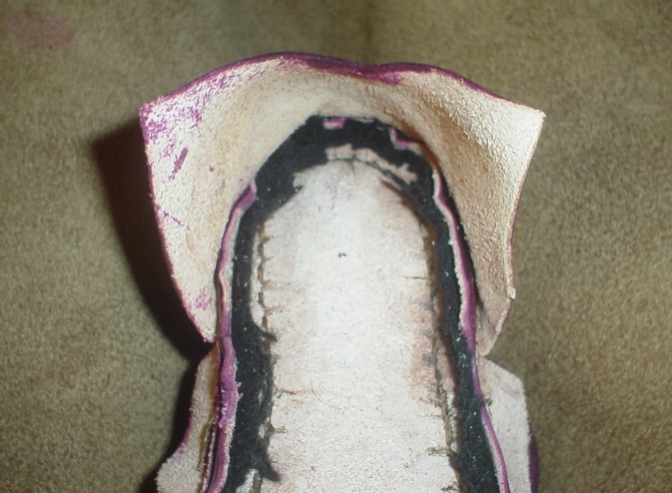
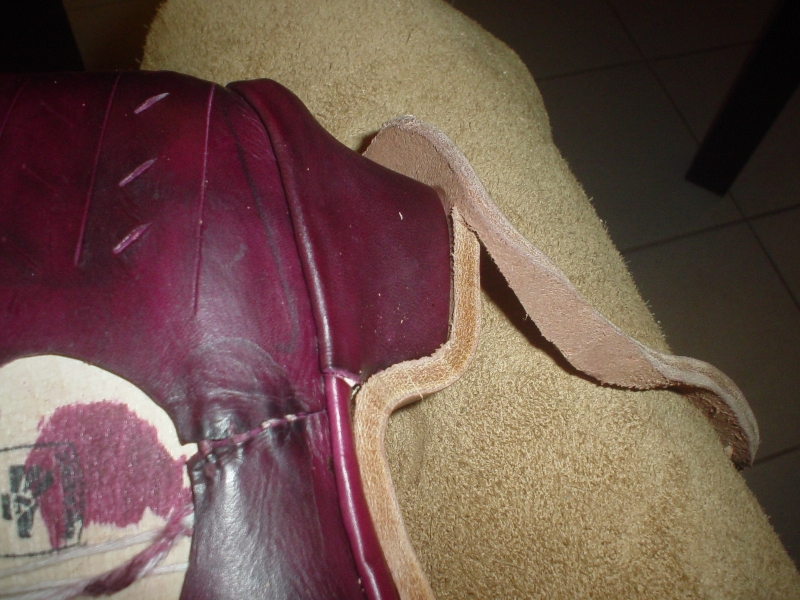
The heel cover is sewn on! Now, there is only one problem - we need to trim off the lasting margin. This is no easy task when getting into the heel cover is fully stitched it down. I was able to carefully cut it away without piercing the heel cover, but on the second shoe, I trimmed the lasting margin away as I sewed, and I highly recommend that you to do the same. |
 | |
One the lasting margin is trimmed off, it is time to brace. Similar to Lesson 5, where we braced the rand over insole, we do the same thing for the heel. In this case, you will notice that there doesn't seem to be a lot of material across the heel breast - this is because the heel cover was not large enough. Fortunately, I was still able to sew it. I ended up making the heel cover larger for the second shoe, and it worked much better. |
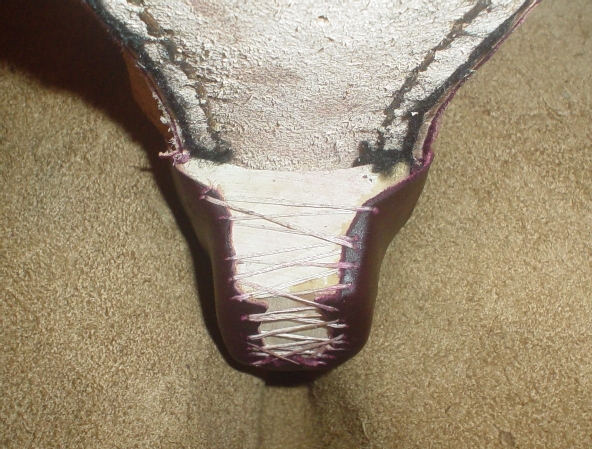 | |
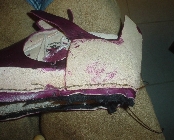
A partial picture of the fully braced shoe. It is very clear that the heel cover needs to be a bit longer. Two other things that I hope you learn from (as I did): The first is that the sewing cord I used to close the upper was coated with the old white synthetic wax that I used to use - as a result, there was not enough friction to glue the stitches together, and a little bit of separation can be seen because of the stress during the lasting process. Secondly, the last shows some evidence of dye - that is because the dye that I used was somewhat fugitive when the shoe was lasted, and I had to overdye it once it was lasted to get the right color. Be sure to wet the rand prior to bracing, as you will get a much tighter brace. Additionally, once you have finished bracing, you should gently hammer the rand against the upper to flatten it out and make it more uniform. |
 | |
Garsault, in his 18th C. text, describes fitting the outsole to your last, and then trimming off the excess. If your outsole is dry, you have no hope of being able to do this easily. However, if you soak your outsole for a good long time (4 hours minimum) then you can press it into the crevices of the shoe and tack it down. Then, it can be trimmed easily. This shows a bit of the trimming process - if you see the outsole leather that is being trimmed off, you can hold onto that and use it to work against the blade to trim more easily. |
 | |
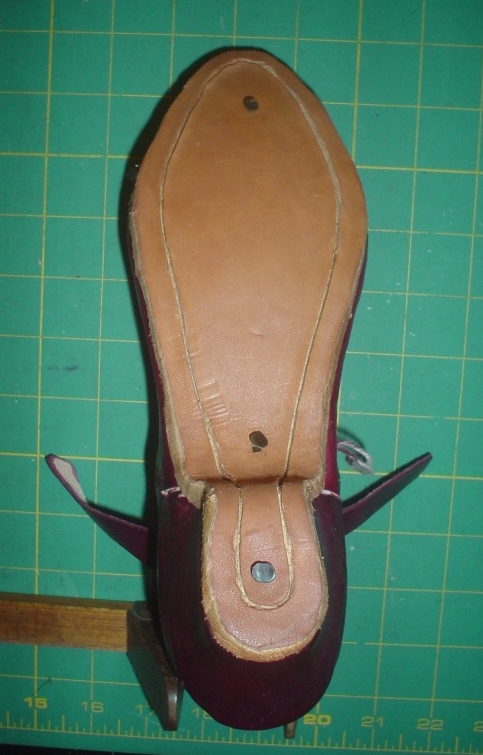
A shot of the bottom of the shoe, with the outsole already tacked, trimmed, and the stitching groove made. One-piece outsoles like this were common in the 16th and 17th centuries. It also helps to reinforce the heel breast as no shank is used to support it. In retrospect, I should have used another nail in the center of the sole, but I did this on the second shoe, and it worked much better. |
 | |
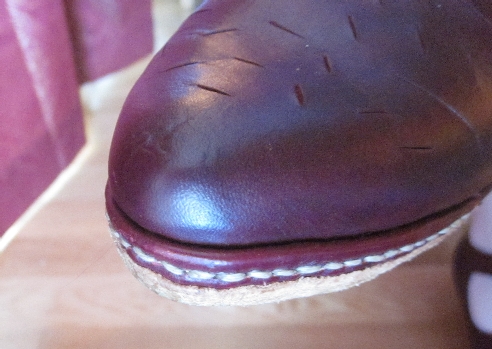
At this point, it is a matter of stitching the outsole on through the groove. Note that instead of straight awls, I used a slightly curved awl on this shoe and it worked much better! Here is a shot of both the toe and the heel. |
  | |
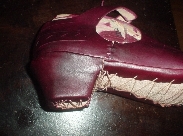
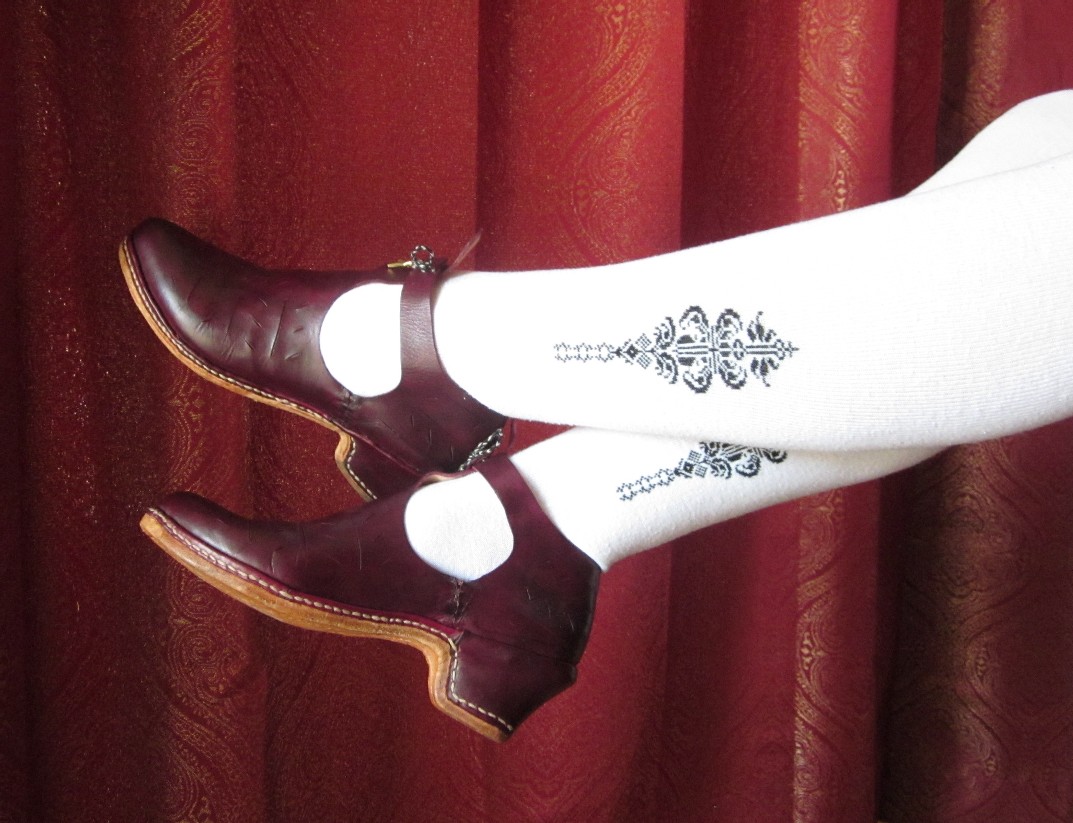
Holes are punched in the straps for a point, and they are done! Note that an additional pair of holes would have been punched just below it to have a fabric rosette which would cover the tie. |
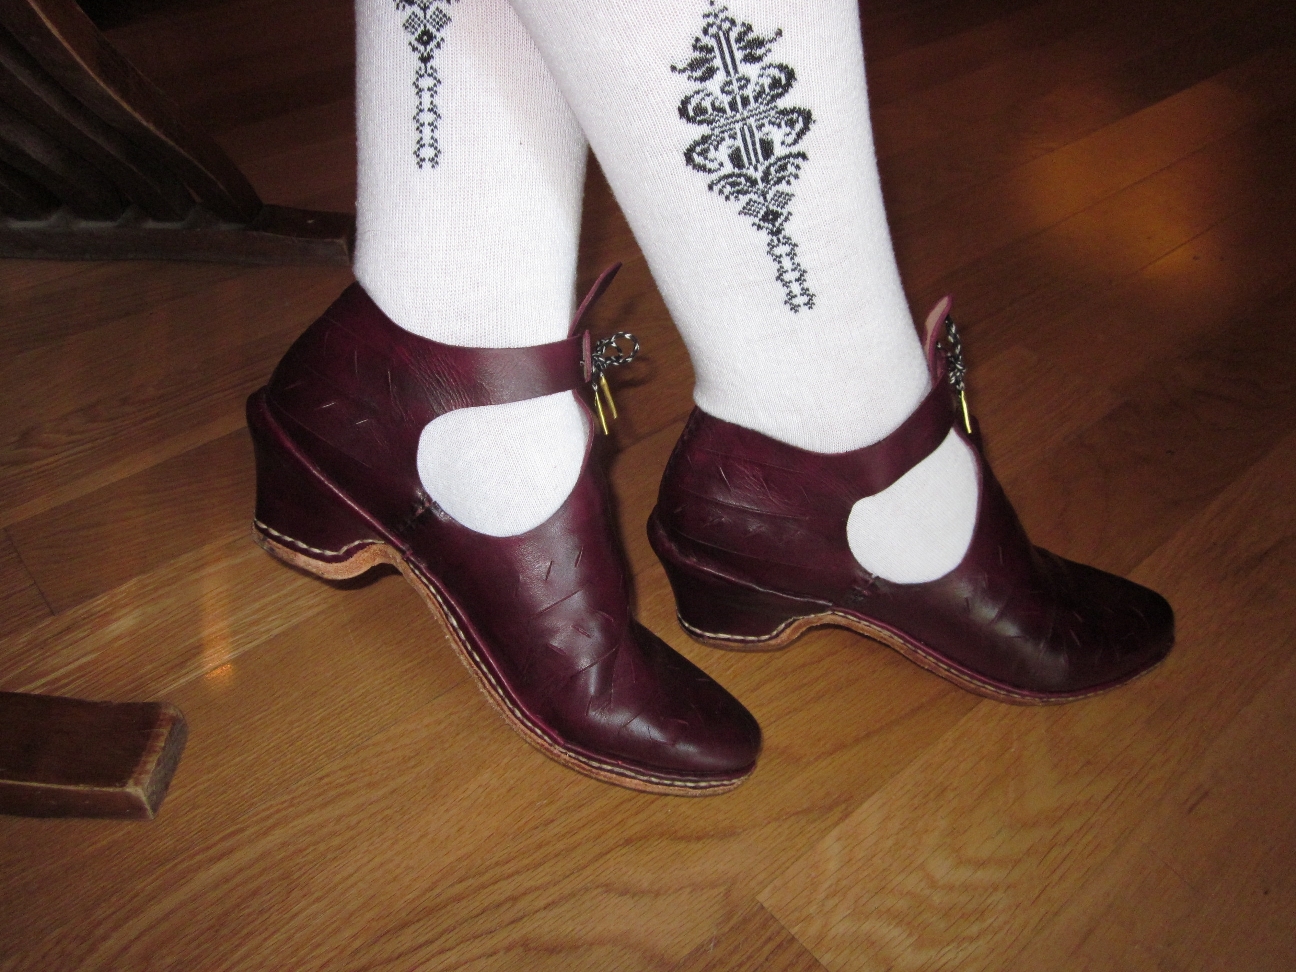 | |
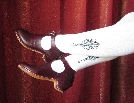
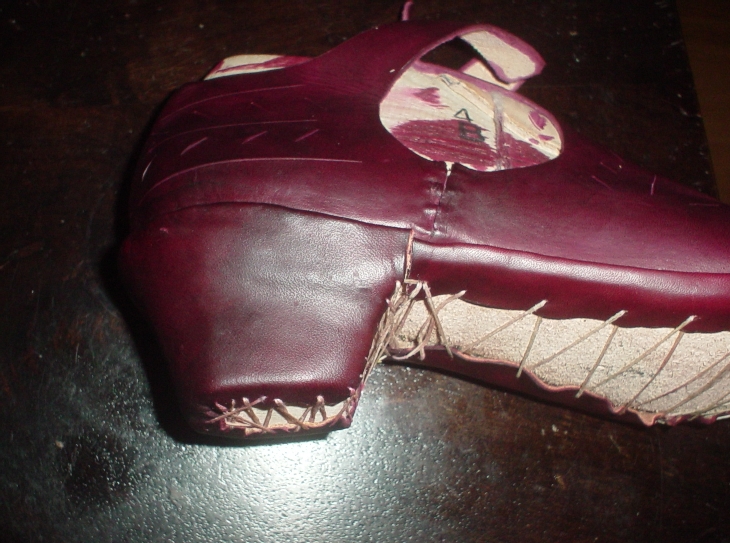
Another shot of the shoes, because I just adore this particular one! These were crafted for (and modeled by) the very lovely Sarah Goodman. |
 | |