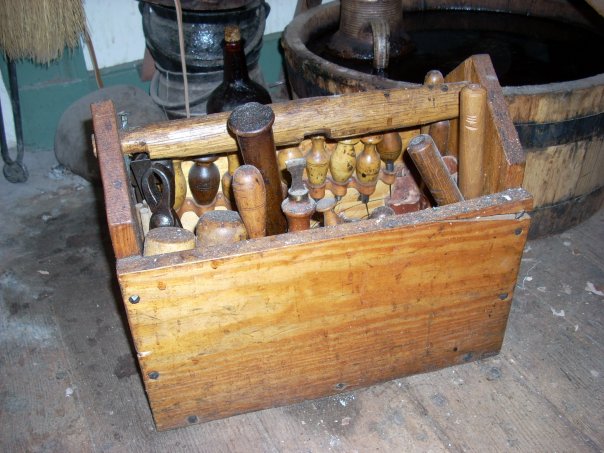
Right, documentation! The cornerstone of any solid project. I'm fortunate to have obtained several pictures from the Shoemaker's shop in W'burg documenting toolboxes of this kind. This first photo is a replica of a 1660s
shoemaker's box found at Church Neck Wells, Northampton County, Virginia.
|
|
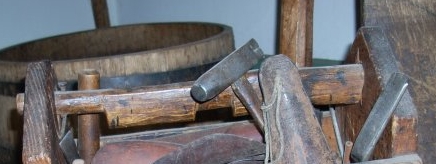
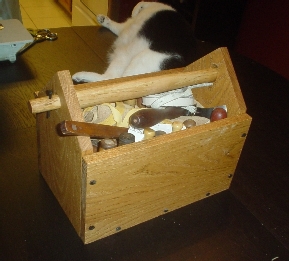
For reference, here is another toolbox, called by the W'burg folks, a Journeyman's box. It's unclear if this is original, but I suspect it is a reproduction since it actually seems to be in use in the shop, and not in a
special area =). The construction of both boxes is very similar - in both cases, fairly thick wood is used (I estimate 5/8 to 3/4" thick), and it is a simple box with the side panels being nailed into the triangular end
panels. It is possible that two nails grace the end pieces, but it is not possible to tell, so these were left off in my replica (I can always add them later if needed).
The materials are also not completely clear - the top one could be stained alder or ash, possibly pine, but the lower one seems to be oak.
|

|
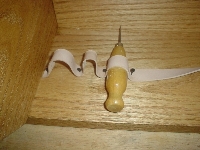
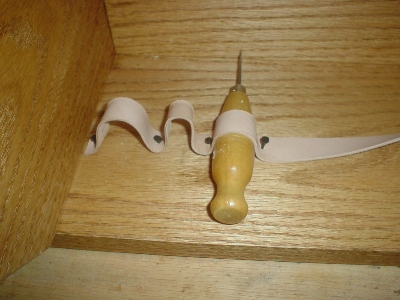
There are several special things to note. Let's start at the handle. If you look closely, both of them are very similar (probably modeled off of the same find). There are two oval holes bored into each side of the box.
I'm confident that they are oval, because one would want the handle to be fairly solid, not twisting around all the time. Each side is carved in such a way so that on the right side, the handle can slide into the hole,
but is stopped from going any farther. This can best be seen on the lower picture. On the left side of the handle, there is a much longer thin portion, but there is also a nail which is inserted into a small hole of the handle.
This nail prevents the handle from sliding far into the hole on the left side, as this is the manner in which the handle is removed for easy access to the tools inside. We should also take note of the center notch - from
my discussions with the W'burg shoemakers, it seems that one would carry the box using one's stirrup slung over the shoulder - this makes much sense, as the toolbox is a bit heavy, and when slung over the shoulder is much
more mangeable.
|

|
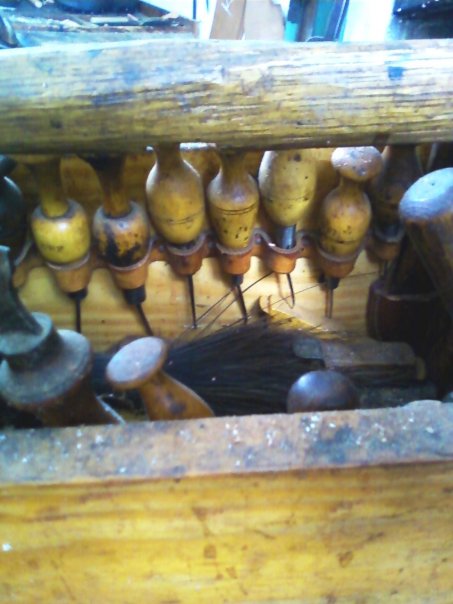
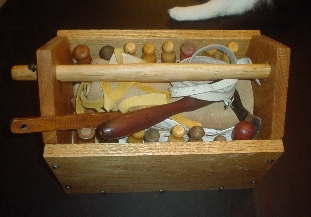
The folks at W'burg have graciously provided me with some interior photos of the two sides of the toolbox, for which I've grateful. They yield a very good amount of information as to the construction of the toolbox interiors.
Looking closely, we can see a neat little row of awls on each side, with a "pocket" for each one. A leather strap is nailed in place between each awl to keep it open. Burnishing bones, bristles, hammers, and an iron are also visible.
|
|
This is the other side of the toolbox. I can't help but drool over these beautiful awl hafts!
|

|
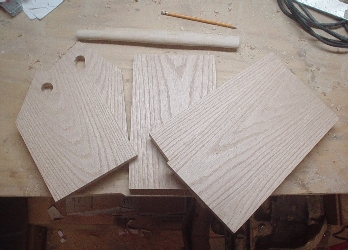
Ok, down to construction. I decided to make my box out of red oak, 3/4" thick, so that it would wear like a brick, but hopefully not be too heavy. The W'burg reconstruction
is 8" wide by 13.5" long by 11" high, and I made mine very similar in size.
|
|
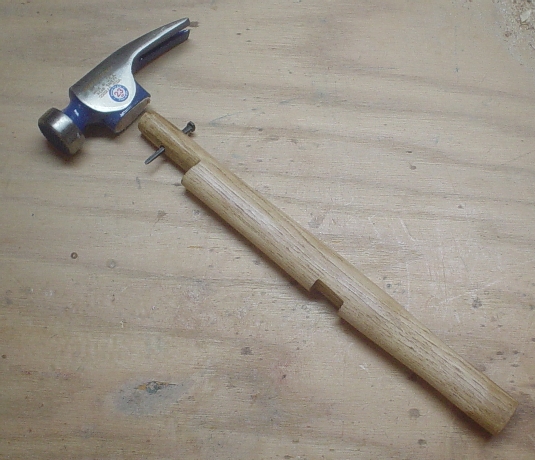
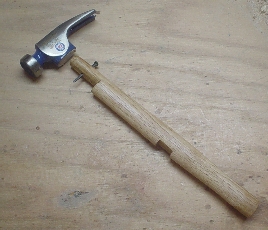
Also, I have to admit it - I am lazy! I didn't feel like carving a handle out of oak, so I cheated. =) I purchased a breaking hammer and cut the head off of it
to grind it down to shape.
|
|
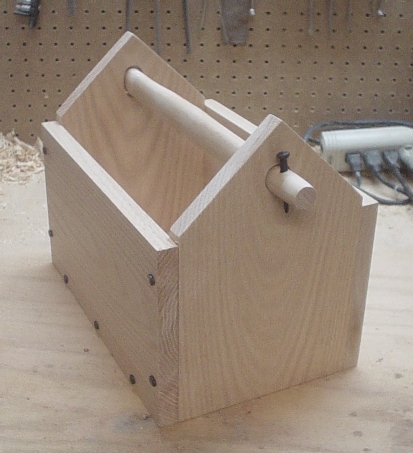
A view of both the front and back of the assembled toolbox. I had to pre-drill some holes for the very thick nails (otherwise they would completely split
the wood at the very edge) and nail them in carefully - I did end up using glue as well to ensure a solid fit. You may also notice that the nail on the handle
is in the wrong spot (it should be inside the box, not outside) - there is a reason for that, and I'll discuss it more in just a bit.
|
|
Once you've assembled the box, it's time to tack the awl strap in. First, you will want to arrange your awls in a manner that makes sense to you. Each cordwainer is different,
but I planned to put a variety of curved awls on one side, sorted by shape and then by size, and on the other side, pegging awls, stabbing awls, diamond awls, and a couple of other tools.
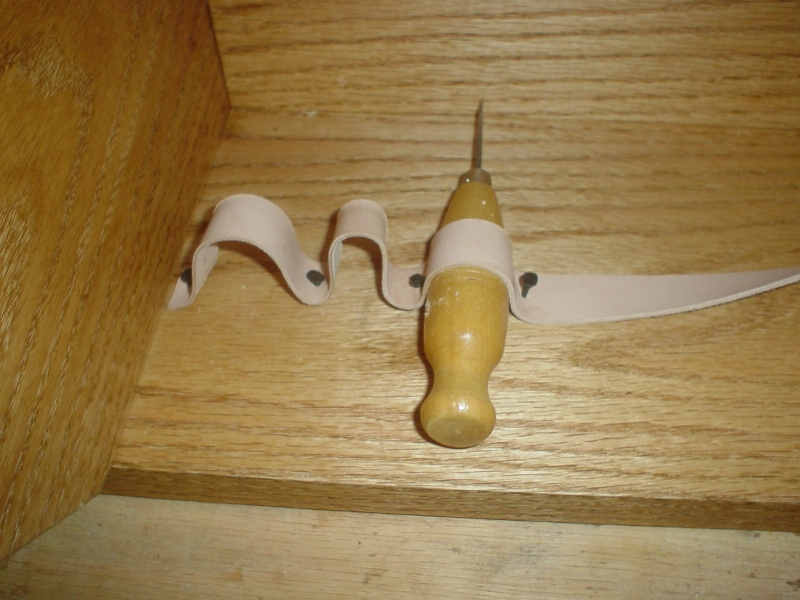
Once you have an idea of how you want to lay out your awls, start with a long strip of leather, 3/4" thick, and tack at one side. Then, slide one awl in to where you want it
and place a tack, but not all the way in! You want to be able to pull it out in case you make a mistake. Also keep checking with a carpenter's square that the strap is
the same distance away from the edge of the box.
|
|
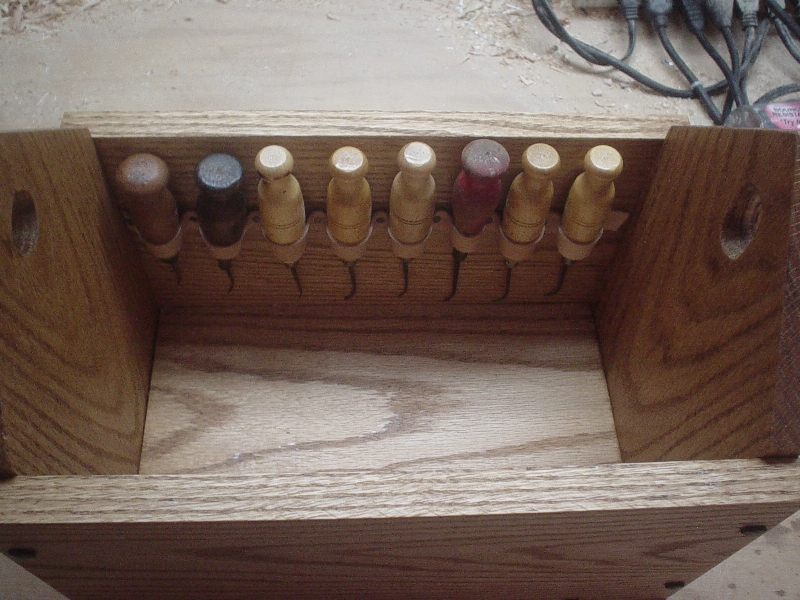
One side is done - look at the awls lined up, like a pretty chorus line! |

|
From this point on, the rest is straight-forward: tack in the other strap and stain the piece. Pay no mind to the lazy assistant sleeping in the background.
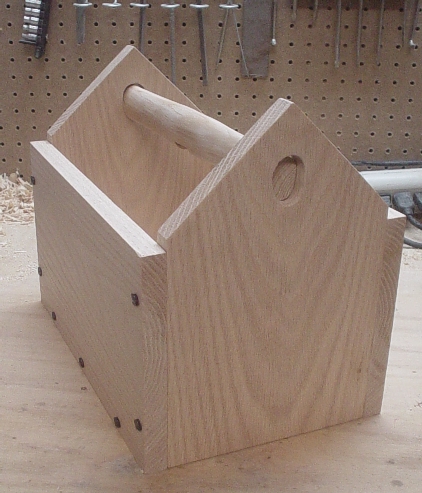
However, now I should tell you of my primary mistake. If you look at the right hand side of the box, you will notice that the handle can fit all the way into the oval hole -
so far, in fact, that if I did not put a nail on the outside of the handle, it would slip right out. Basically, I cut the oval for the right side large enough to admit almost the
entire right side of the handle. In fact, it should have been cut so that the handle's right side only just goes through the oval hole, and the handle should have been cut with a notch
similar to the left hand side of the handle. This is why the nail is on the outside - fortunately, there is not enough play to let the handle completely out of the box, otherwise
I would have had to figure something out!
|
|
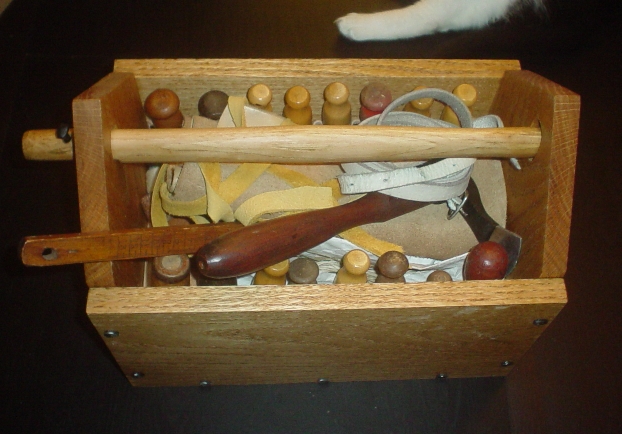
A view of the interior of the box. Let me also list, for your edification, the contents of my shoemakers box:
- Awls: (8 curved, 2 pegging, 3 stabbing, 2 diamond, 1 tack puller)
- A leather apron and stirrup
- A French shoemaker's hammer and a measuring stick
- Boar Bristles, 2 types of coad (shoemaker's wax), and waxed ends
- Three shoe knives and one round knife
- Sharpening stone (from the 18th C. wreck of the HMS Collosus =)
- Small tray, a pouch for extra awl blades, lasting tacks, etc.
- 2 Burnishing Bones, 2 lasting pliers, a fiddler, shears
|
|