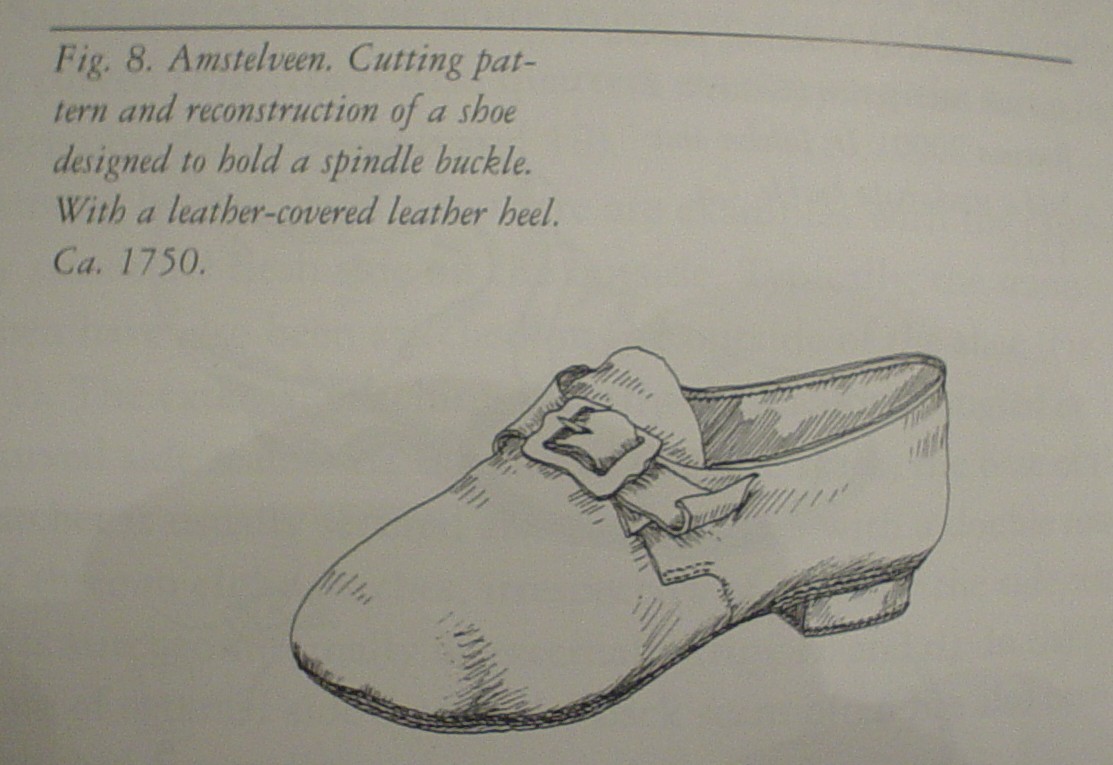
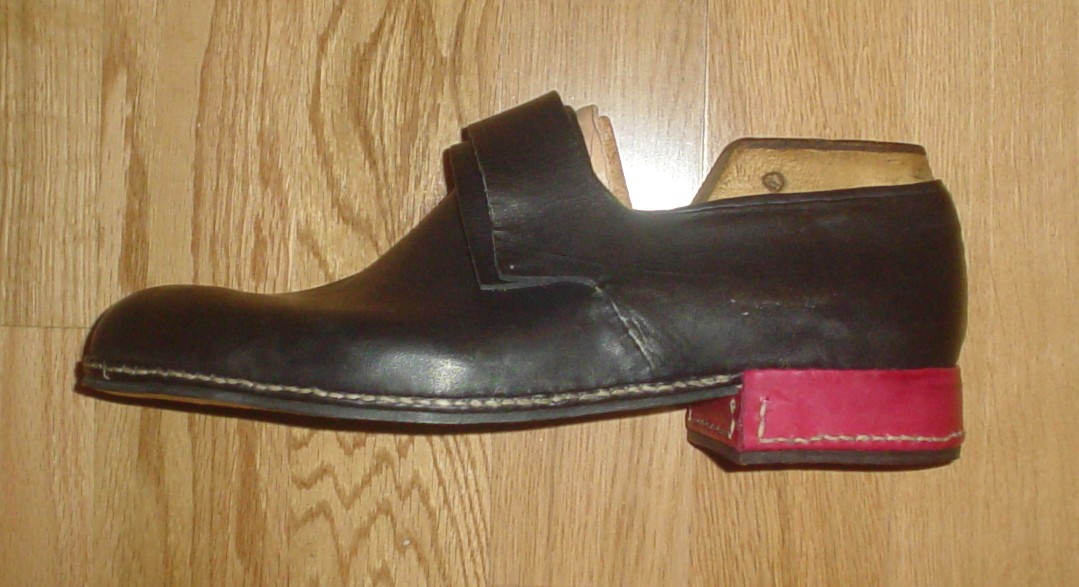
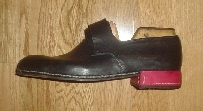
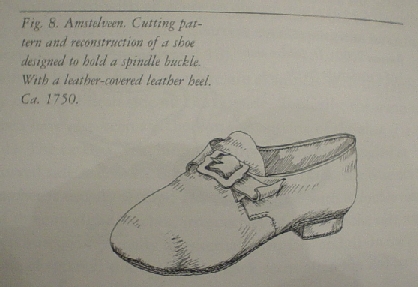
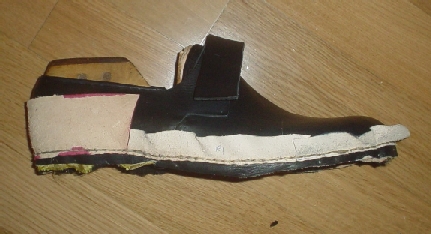
This is a picture of the shoe that we're attempting to recreate. This is a photograph from Goubitz's "Stepping through Time" in the section on shoes with removable buckles.
|
|
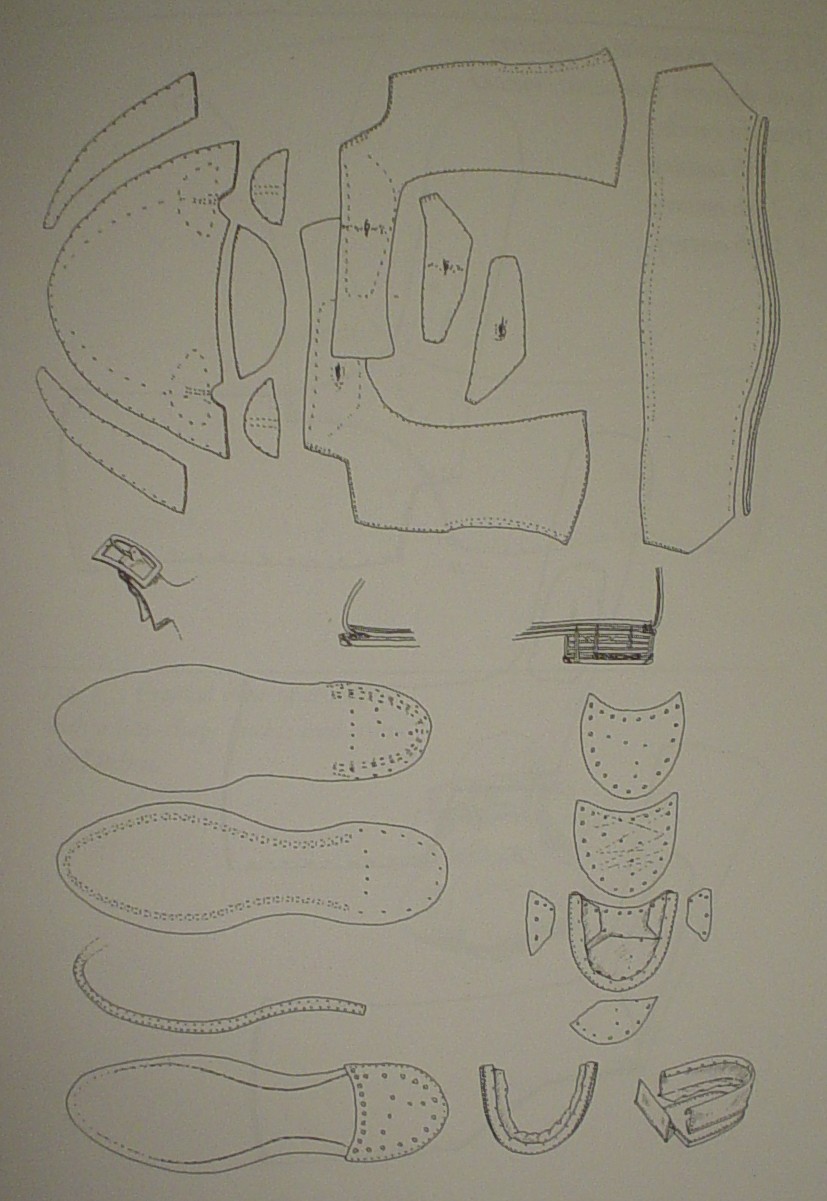
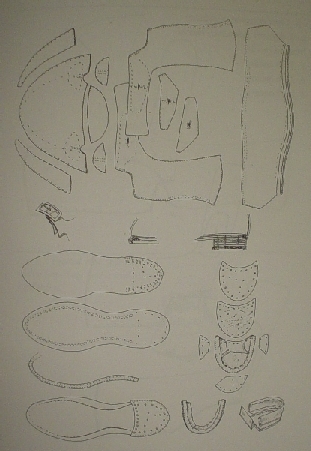
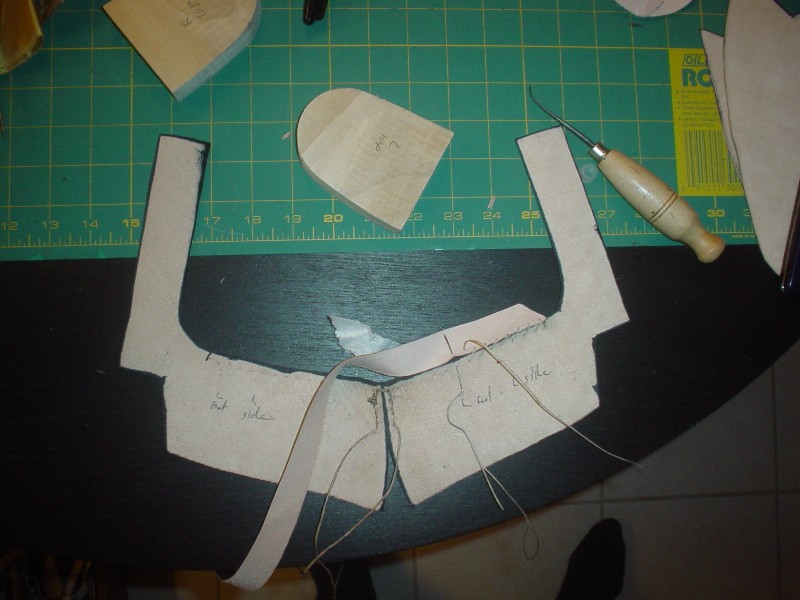
This is the cutting pattern for the shoe. Note that there are several reinforcing bands, and what appears to be a separate lining for the quarters as well as supporting pieces at the front sides of the vamp and the latchets themselves. If you look at the type of buckle that this shoe is intended to incorporate, you'll notice that the leather actually folds back on itself. Additionally, there are reinforcing pieces where the holes for the buckle are as well as the stitches attaching the latchet to the upper. This seems, to me, to indicate a slightly thinner leather, one that requires reinforcement in order to maintain a solid shape.
In terms of the actual construction, instead of using an edge/flesh seam like most 16th century shoes and medieval turn shoes use, this design uses tunnel stitches to generate the upper/welt/insole hold. Interestingly enough, there is actually an insole and a midsole; the upper and welt at the heel is sewn onto the insole, and elsewhere, they are sewn onto the midsole, all with tunnel stitching on the sole and through the thickness of the upper and welt..
|
|
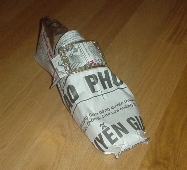
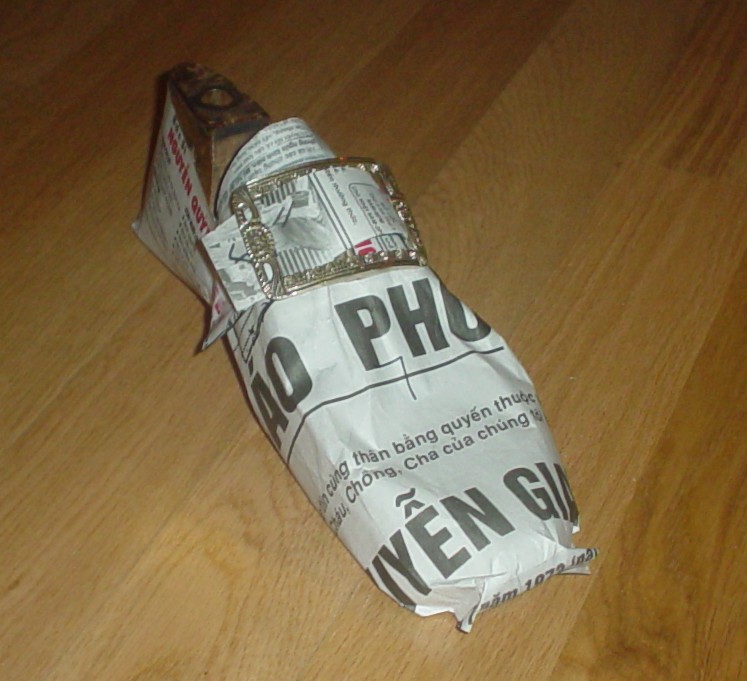
Sometimes getting the patterning perfect is a major part of the job. Based on the patterns in the cutting diagram, the newspaper was cut out and tailored to match the vamp and latchets. Taped together, here is the overall pattern.
|
|
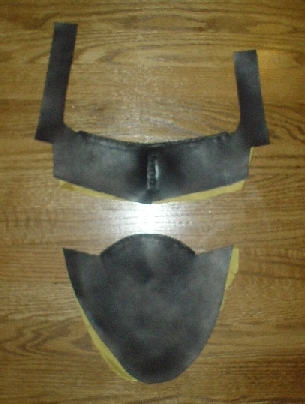
The back center of the latchets was sewn together in order to start the top edge binding. Note that they were not sewn all the way down because the latchet back center seam is curved, and it would make sewing the binding onto a non-flat seam much more difficult. The binding is whipped through the edge of the top of the latchet, moistened, pounded flat, and then wrapped around for additional stitching. Also note the poplar heels that I decided to use instead of stacked leather.
|
|
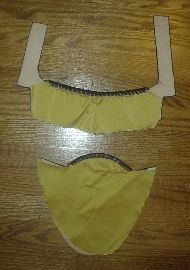
I decided to use silk taffeta instead of thin leather lining for the quarters, and although the original did not have any lining on the vamp, I decided to put a taffeta lining along the vamp as well.
|

|
A top view of the binding edges turned over, whipped, and pounded flat. Note that the binding edge on the latchets does not go all the way to the curve, as the original does not, and this part will get a lot of friction going through the buckle. It was lined up with the vamp, but I did not account for stretching of the quarters, so I probably should have made it come closer to the curve of the latchet.
|
|
Although the original had no toe stiffener, it did have some side reinforcements, and I decided that I'd add the toe stiffener on anyway, since it would keep the shoe toe more stable over time.
|
|
Fast forward!!! Too fast, actually. Here is a view of the uppers stitched together and lasted. You will notice that there are little nails sticking out of the latchets holding them onto the vamp. I went too quickly, and although I meant to sew the latchets to the vamp, I had forgotten. This resulted in the quarters stretching more than expected, and left a small gap of leather where there was no binding on the top edge. I think that it would be wise to stitch them down before lasting, and I'll probably do that next time. Additionally, you don't see the single insole that was cut to appropriate proportions, nor the wool sock (it's not actually a sock, it's just the insole lining which is sometimes called the sock) which is also sandwiched between the insole and the last.
|
|
After the shoes were dry, I stitched the welts on. Note that this construction differs slightly from the original in that the original piece uses tunnel stitches on two separate layers to attach the upper and welts together, but as I was on a tight time schedule, I decided to use edge/flesh techniques that were in use at the time and ones that I was familiar with. I suspect that tunnel stitches would have given a flatter form, but I have never had any issues with walking on my welted shoes sewn with edge/flesh.
|
|
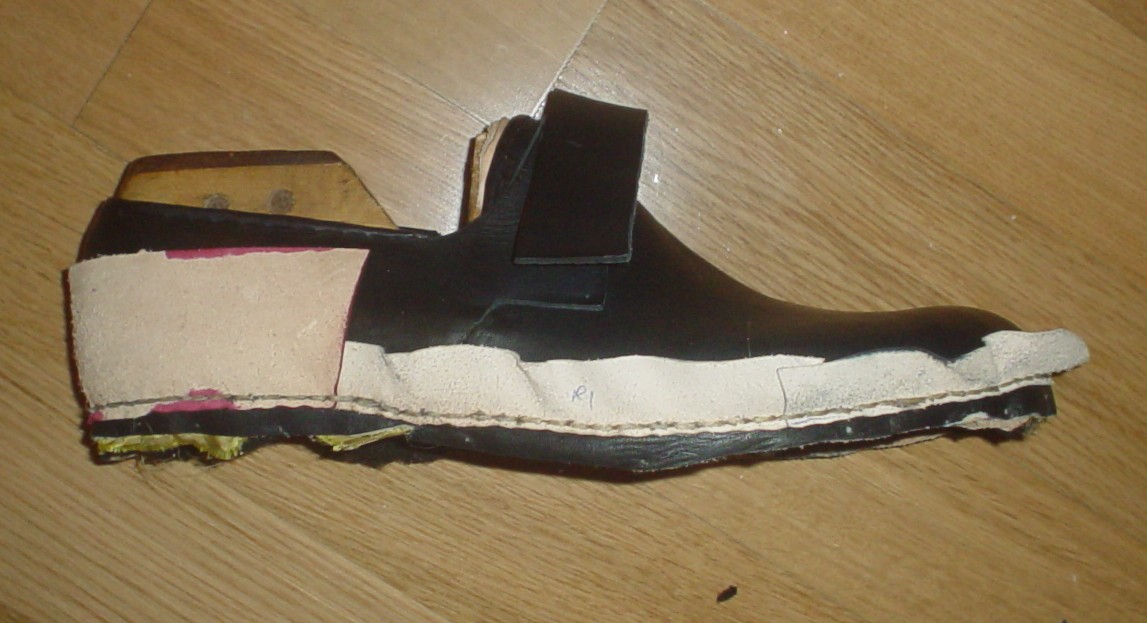
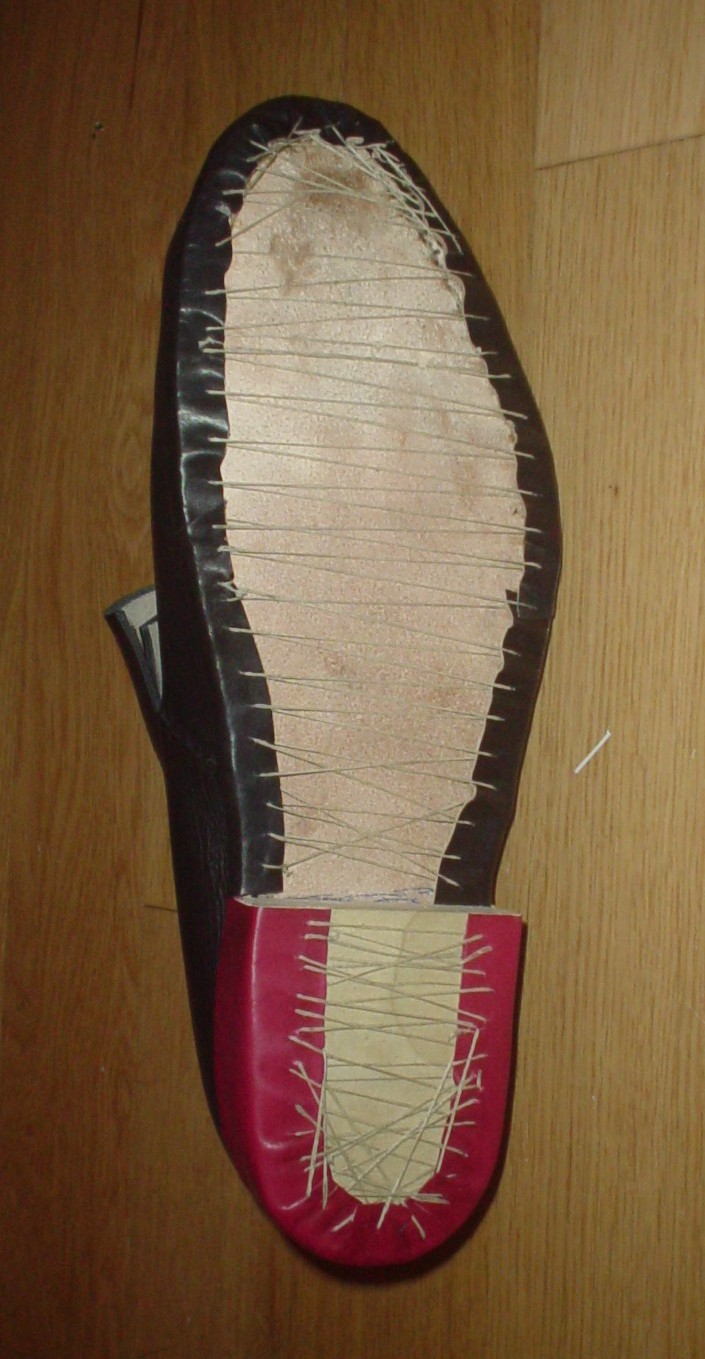
First, we trim down the excess of the upper and welt. Then, we have to attach the heel. Goubitz shows little wooden pegs attaching the layers of leather together which make up the heel. However, as I decided to use wood heels instead of stacked leather, pegs wouldn't be appropriate. So, I decided to simply glue the heel in to keep it in place while I wet the welts and folded them down. In truth, although timber heels were common in the 18th century, I don't yet have evidence for nails or other means for attaching them to the insole/midsole. I can't imagine that the tension of the welt would have been sufficient alone, as the heel would probably move about. Using a small hammer, I pounded the welts so that they formed a nice folded edge along the lasting marging. Then, a glovers needle with some linen thread on it was used to hold the welts underneath. This technique was actually used, as mentioned earlier, on the heel of the extant shoe underneath its outsole. The cutting diagram actually shows a representation of the zig-zags of thread that would have kept the welt inside. Once this was done, an outsole out of thick leather was cut for the heel and the front of the shoe. Just like for chopines, a stitching groove was cut into the outsole and then both outsoles were tacked onto the last in place. Note that in the period example, the welt was folded outwards for the areas not including the heel. I decided to fold mine under because I prefer the way that it looks, but is also historical. Also, interestingly, there is no stitching groove for the heel stitches, which are very fine. This is a point at which having the extant piece in hand would be most useful. I plan to do more research on this, especially for the 18th C. pair of ladies' shoes that is on the list.
One thing to note is that the heel should actually be curved, like a modern heel. This makes walking in them a bit more comfortable. Goubitz actually shows this in a part of his cutting diagram where he shows the heel construction, but he actually mis-draws it where he shows the welt wrapping around - he shows it as straight across rather than curved. I had this picture in my mind when I fashioned the heels, and by the time I realized it, the shoes were pretty much already assembled. Additionally, note that there is no shank in this shoe. Goubitz says that metal shanks were not really used until the 19th century, and at the most, there is a thick piece of leather which acts as a shank in some shoes, but not all 18th C. shoes have them.
|

|
Again, just a with chopines, the awl is pushed diagonally through the stitching grove, going through the welt, paying close attention to try and keep the line horizontal as much as possible. I'll be darned if it isn't starting to look like a modern shoe =). The only thing here is that the stitch length is about twice what it might have been in period. Again, I was on a tight time budget, and was actually stitching these guys during the drive down from Northern California to Costume College in Southern CA.
|
|
The latchets now have holes punched in them at the right spots to allow the buckle to be slid through. In this picture, one of the prongs has slipped out, but tension between the two latchets keeps the buckle in place. And yes, I was doing this in the hotel room =)
|
|
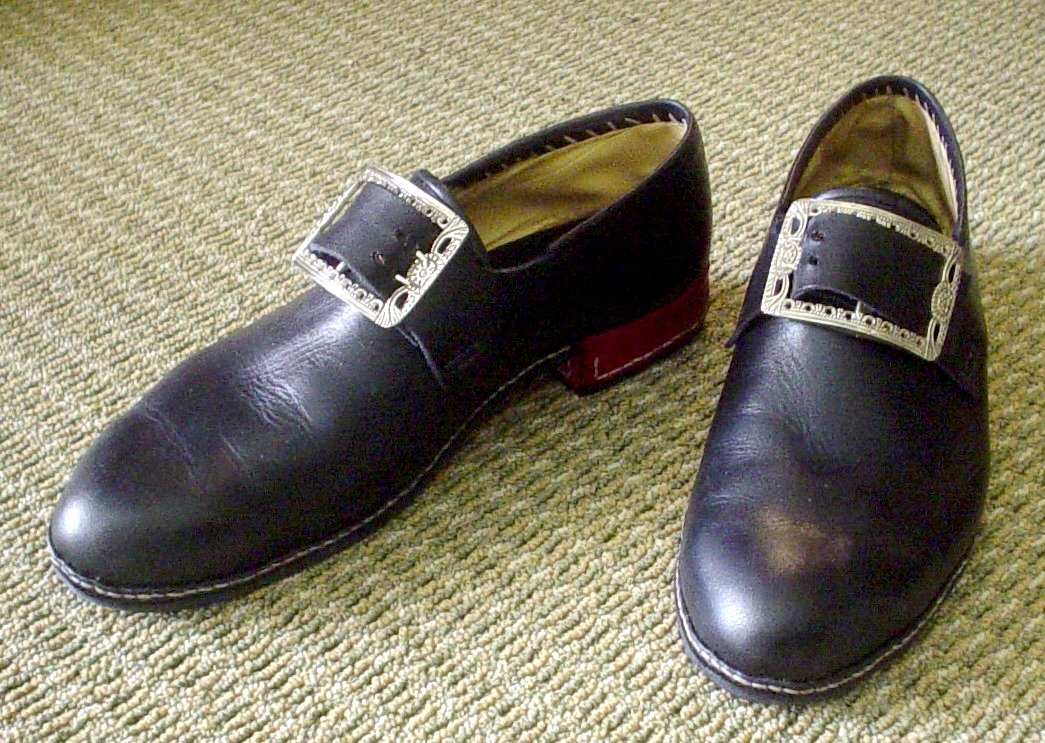
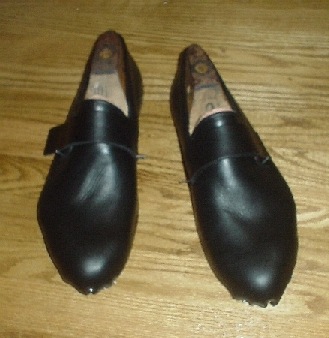
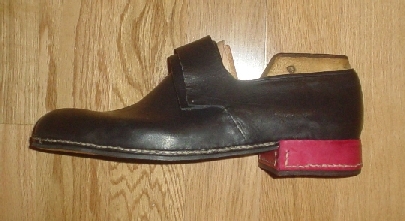
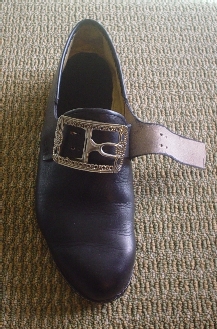
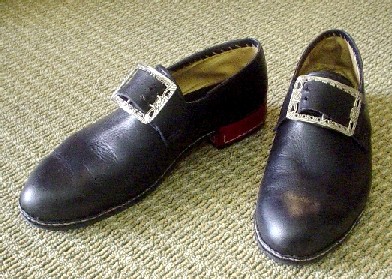
The finished shoes! They were actually reasonably comfortable, although I noticed that they might have been more comfortable if I had carved an arc into the heel (as I described earlier) and which the original had.
|
|