Lesson 7: Mid 16th C. Shoes (Stacked Leather)
June 5, 2010 - This pair of shoes is based on several pieces from Goubitz' "Stepping Through Time." It is included here as it has a single leather heel lift stitched to the bottom. As heels became more widespread in the late 16th C. and into the 17th., one common method of constructing the heel was to sew or use pegs to attach additional layers of leather to raise the heel. In this case, as I wanted only one layer of leather, I decided to use sewing techniques. Note that I have recently come across a source for actual boar bristles, and those were used in the construction of this shoe. As always, if you have any questions or comments, feel free to post and comment to ask for more information. This page is graphic intensive, so I apologize in advance. Each thumbnail will open up a new window with the full size image.
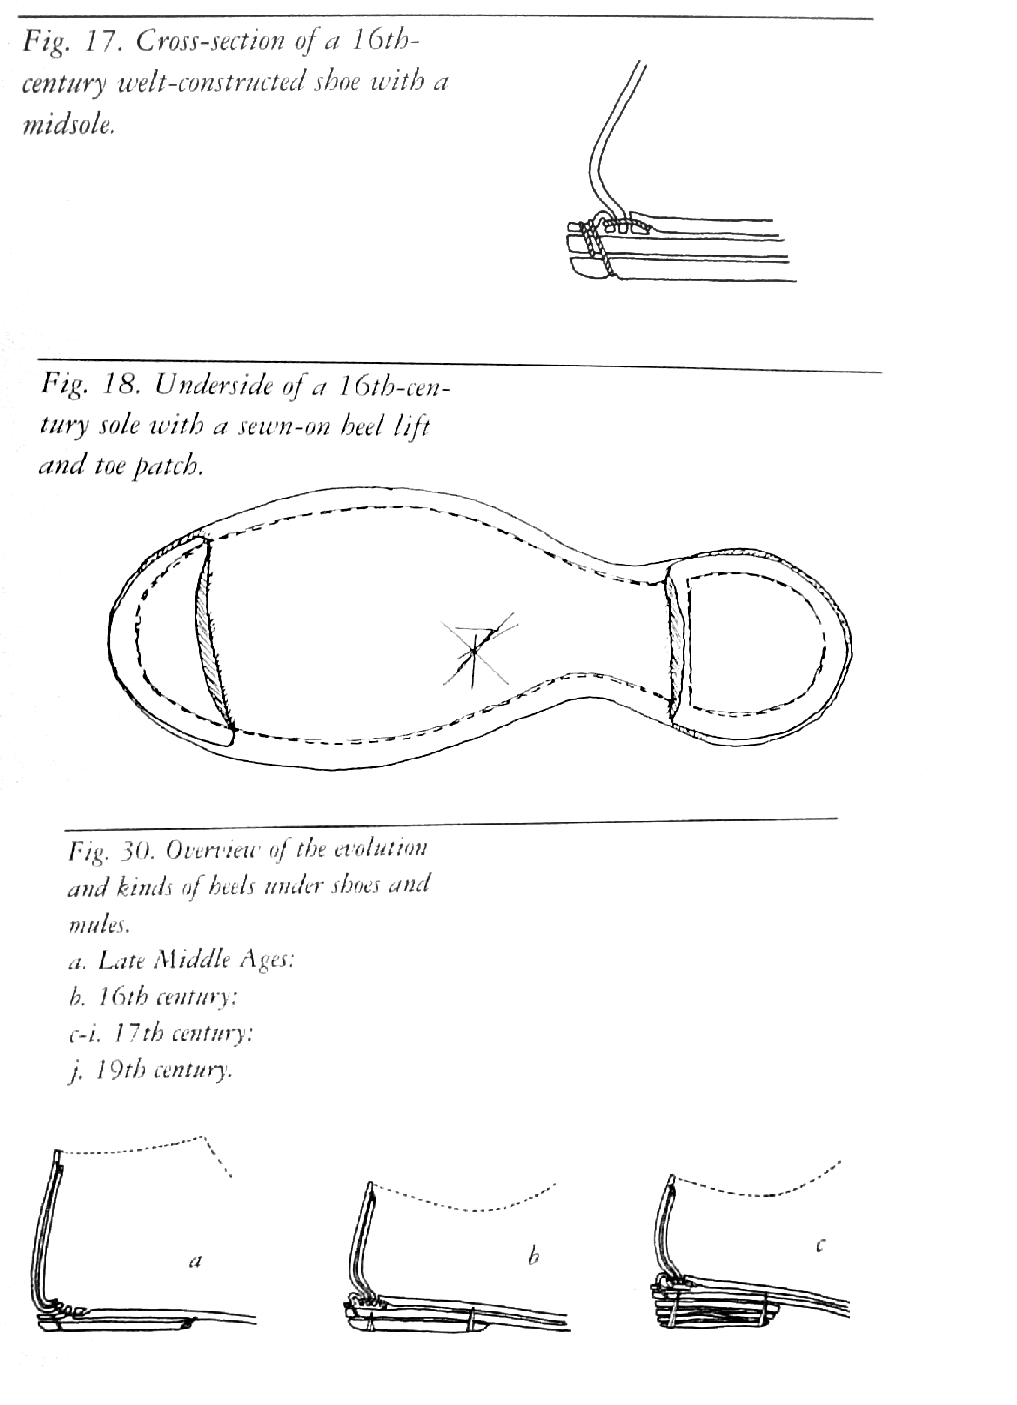
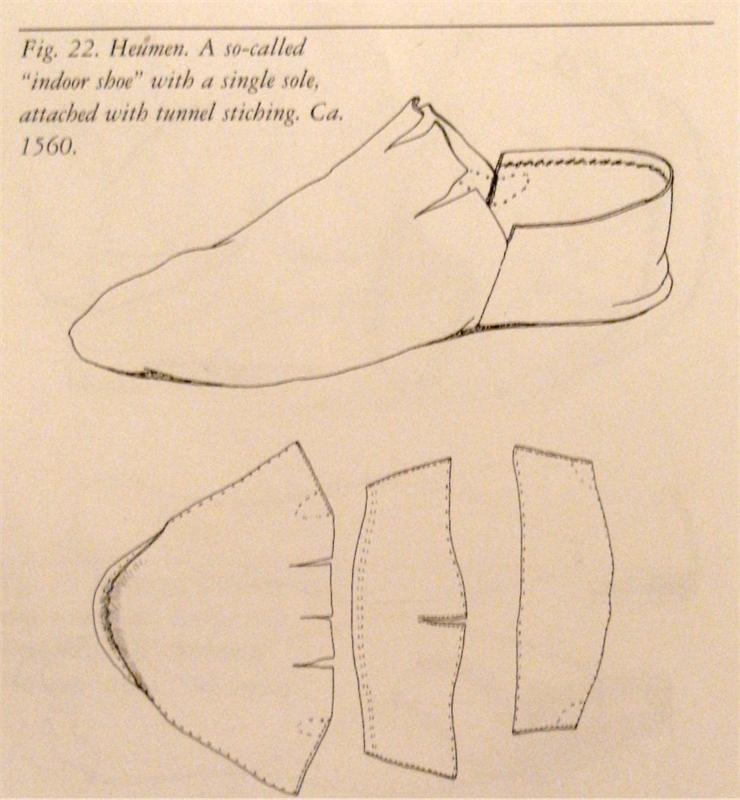
A few shots from Goubitz' "Stepping Through Time." Note the alternate techniques for attaching a heel (likely originally a repair sole) and the transition from turn-rand to welted to pegged heel. I've yet to make pegged soles, so sewing was the logical course of action, and it is also documentable. |
 | |
Approximate pattern of the shoe. Note that the shoe in the diagram is a turnshoe (likely for indoor usage) and although the one I am making is a welted shoe, the upper pattern is similar, with a single piece quarters and a vamp. The extra lining will be made of silk in my case. |
 | |
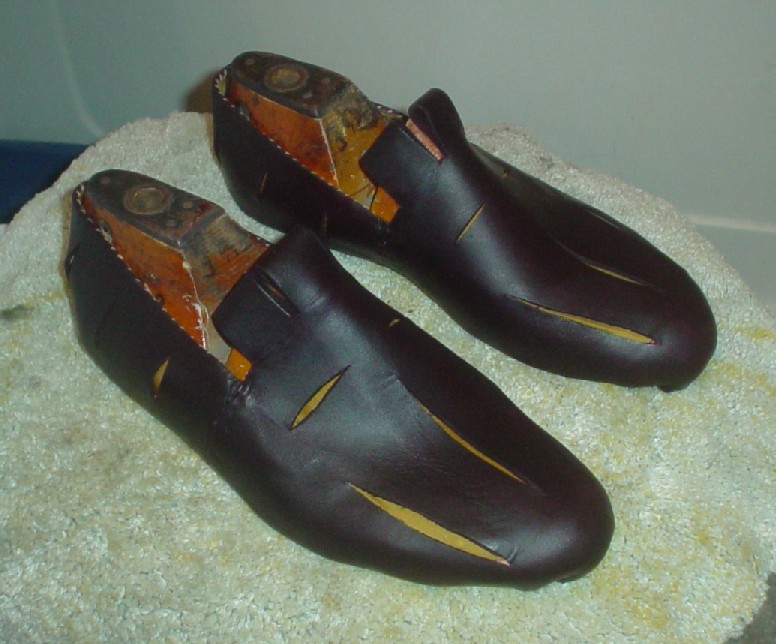
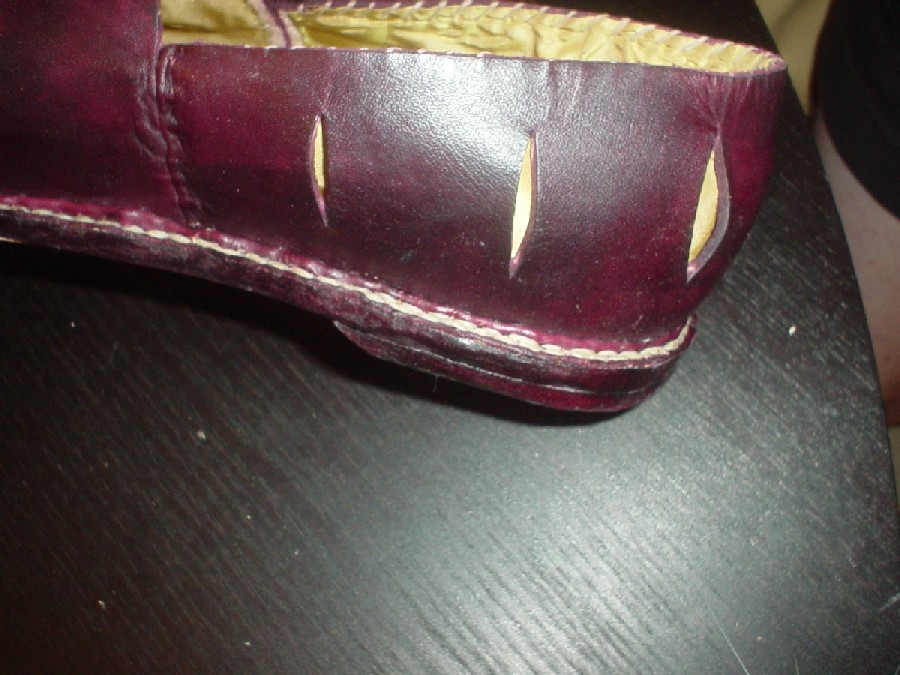
The patterning and construction is similar to that of the 1750s Man's Shoe, so I won't replicate that detail. Fast-forward to now, and you have the lasted uppers. Note that in this case, the pickadils were formed by folding tabs on the vamp down and stitching them down. This could also have been done on the quarters, but instead I decided to tack the lining in with a whip-stitch around the edge of the quarters. |
 | |
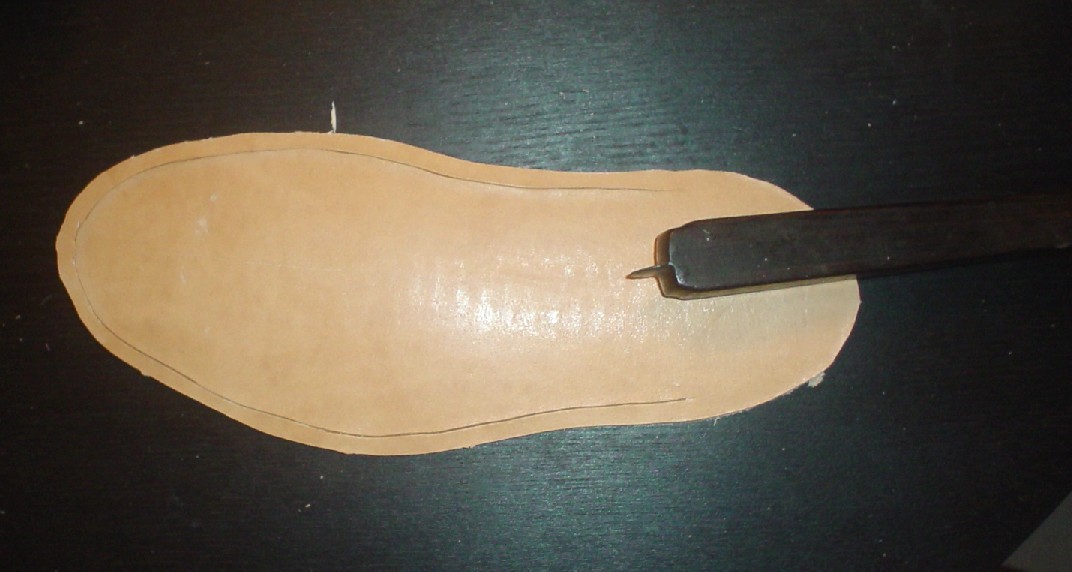
A picture of the outsole. Goubitz notes that the stitching groove did not continue all the way to the heel on the outsole, as you can see here. Although I used the tool shown is to widen the groove, it is actually a burnisher for multiple thicknesses of outsoles (you can't see the other burnisher side), and is made of rosewood. You could also use a dull knife to widen the groove. |
 | |
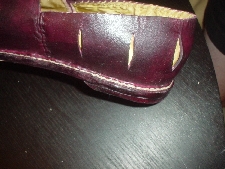
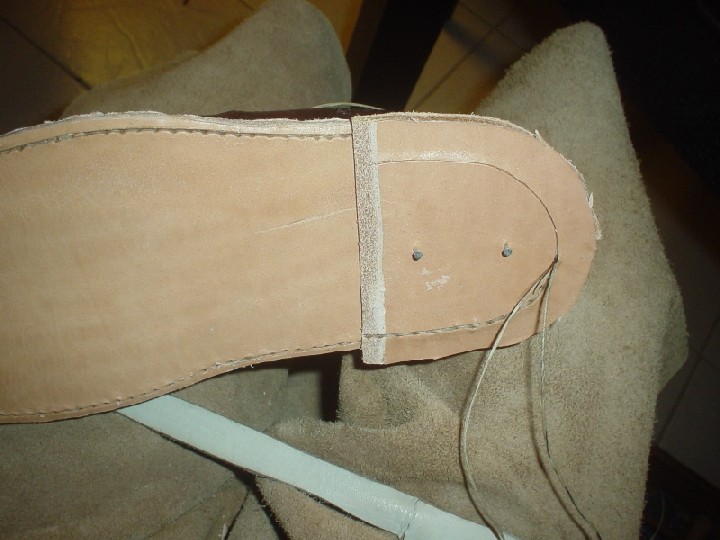
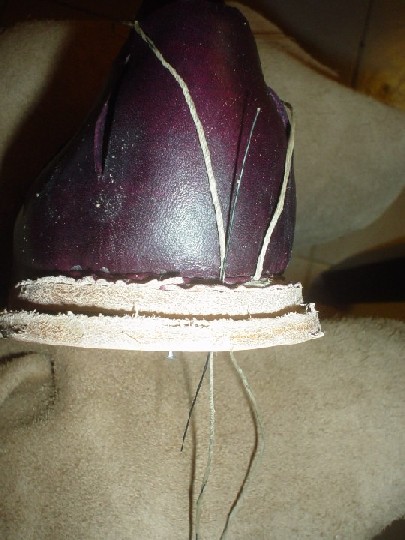
The welt has already been stitched to the upper and insole, and the outsole has been stitched on and trimmed. Note how close the stitching is to the edge of the shoe - this is not quite correct - it should be pulled in from the outside at least another 1/8", but that is a learning experience for you and for me. The heel has also been tacked on and stitching has begin. Note that it is larger than the outsole (which has already been trimmed) and will be trimmed after stitching is finished. If you note the pictures of the actual construction above, you will see that the stitching of the heel lift is actually inside that of the outsole, and that was replicated here. The edge of the heel also indicates that it was skived at an angle, and that, too, was replicated. |
 | |
A shot from a different angle showing the boar bristles ready to be pulled through the hole. There is nothing quite like stitching with boar bristles, as they are narrower than monofilament fishing line of the same stiffness - plus, the "old dead guys" used them! |
 | |
The last step is pegging the shoe, although you could theoretically do this while the heel lift and outsole is still wet (and probably should). For more details on pegging, visit the Basic Techniques of Construction page. |
 | |
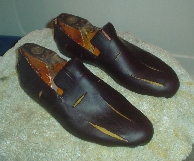
A close up of the heel and shoe once the edge has been trimmed off, the sides of the outsole dyed, and burnished with wax. This is the first time I'd done burnishing with wax on a raw edge, and I'm pretty pleased with the results. |
 | |
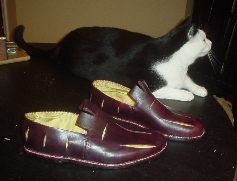
A final shot of the shoes with my assistant in the background. He was very helpful throughout the entire process, although he needs to work on his waxed ends. =) I will also note that the specifics of lining attachment and use are still unclear to me - QEWU mentions lining of various types used in various shoes, but of course, gives no details as to how they were attached or finished. As a result, until more research is performed on extant pieces at this level of detail, I've made a compromise which achieves the desired look and holds up in actual use (the silk will wear out before the stitching fails based on other shoes of this type that I've made before). |
 | |