Lesson 10: Early 16th C. Cow Mouth Shoes, or Kuhmaulschuh (Leather)
July 21, 2012 - I had made a pair of Cow Mouth Boots some time ago, but I never managed to get pictures on the site. As it would turn out, I had promised a commission of a pair of Kuhmaulschuh to a good friend of mine, and thought that this would be a splendid opportunity to write up a lesson on what are a very popular style of shoe and show you how to make these cow mouth shoes (or at least my technique). I will note that the last itself is modern, as was the technique to achieve the splayed-out toe, but you could just as easily fashion a similar last in wood with multiple pieces. This would allow you to remove the last which is a critical part of the process - shoes are not much good if you can't put your feet in them!
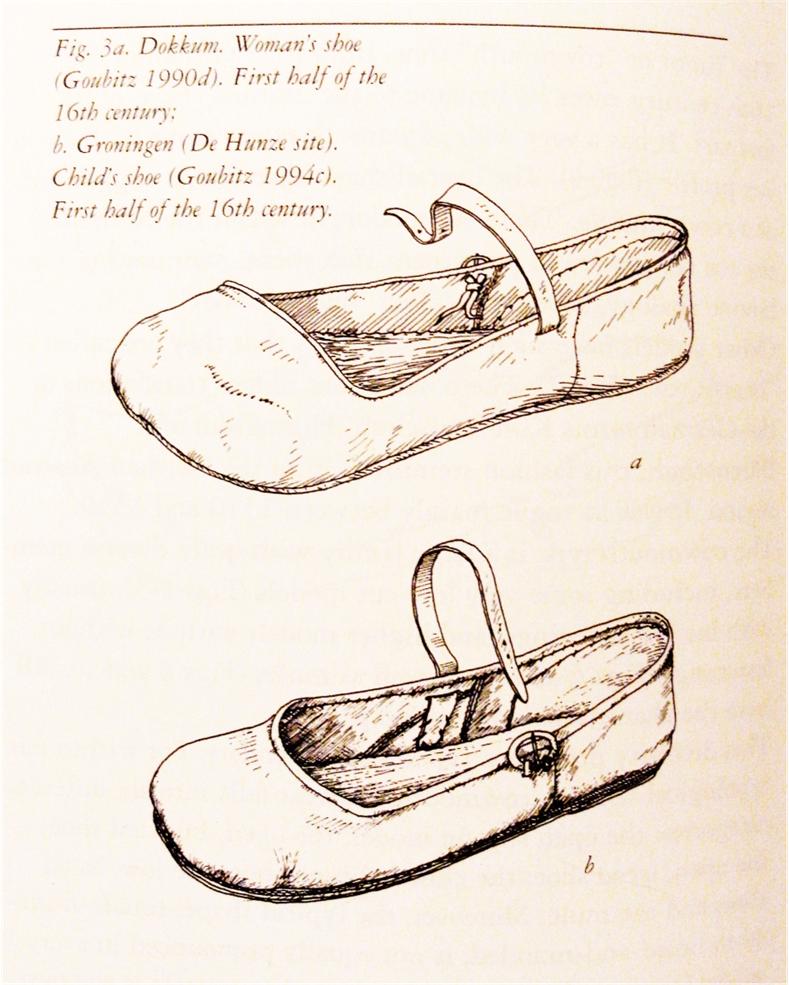
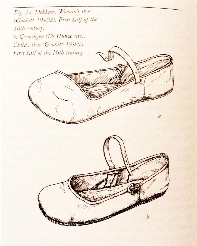
These shoes are based on some extant pieces that we have, again from Goubitz' work. There is quite a bit of documentation out there on these popular shoes and many excellent replicas have been made. Most of the pictorial evidence dates from the early 16th century, as do the pieces from Goubitz. Some cow mouth shoes have a single flat sole while others have a stitched and pegged heel. For this pair, I went ahead and added a single heel lift like the extant piece on the bottom. |
 | |
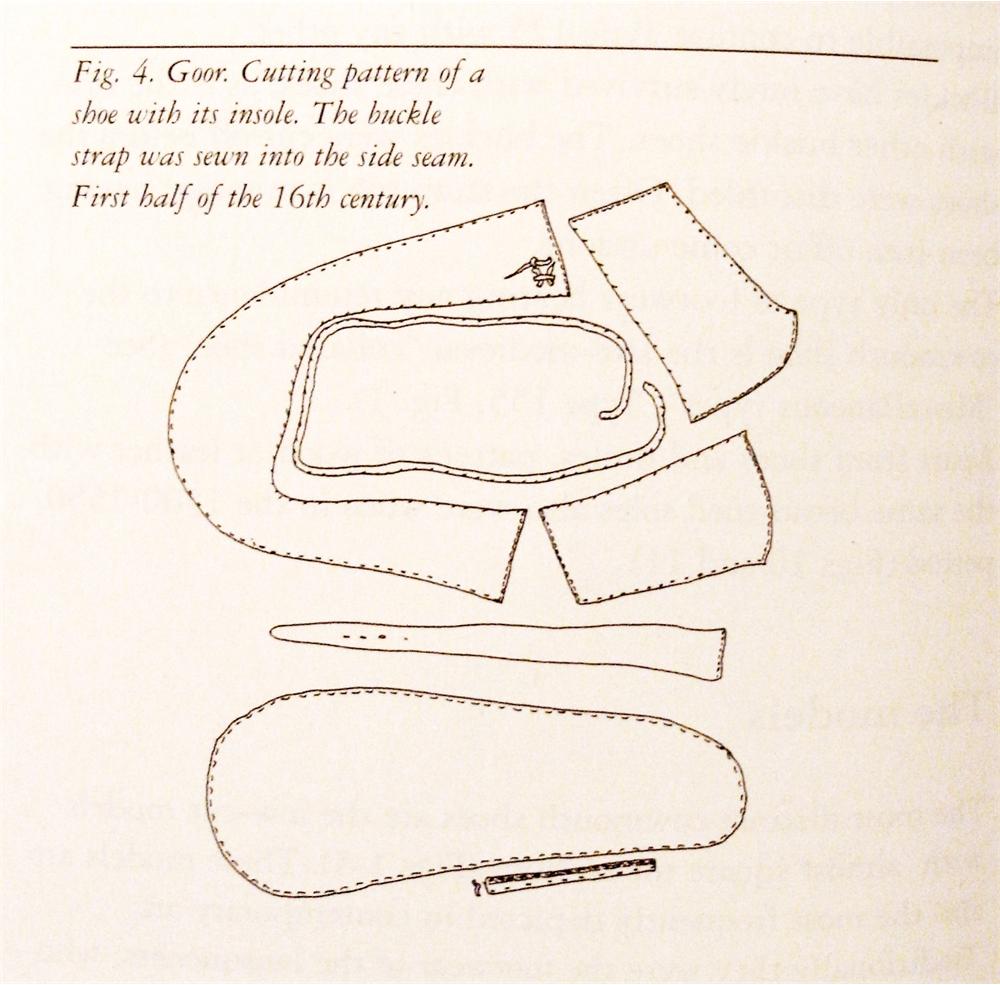
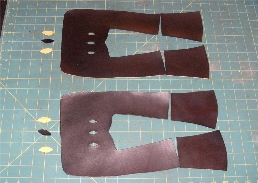
The cutting pattern for the shoe. Note the use of distinct quarter pieces, welted construction (although the outsole is not shown - only the insole is) and the use of bifurcation on the strap in order to attach the strap to the upper. This type of construction is used in the upper example above, which eliminates the need for stitching to the upper. However, tacking in the strap does give a more finished and flat interior. |
 | |
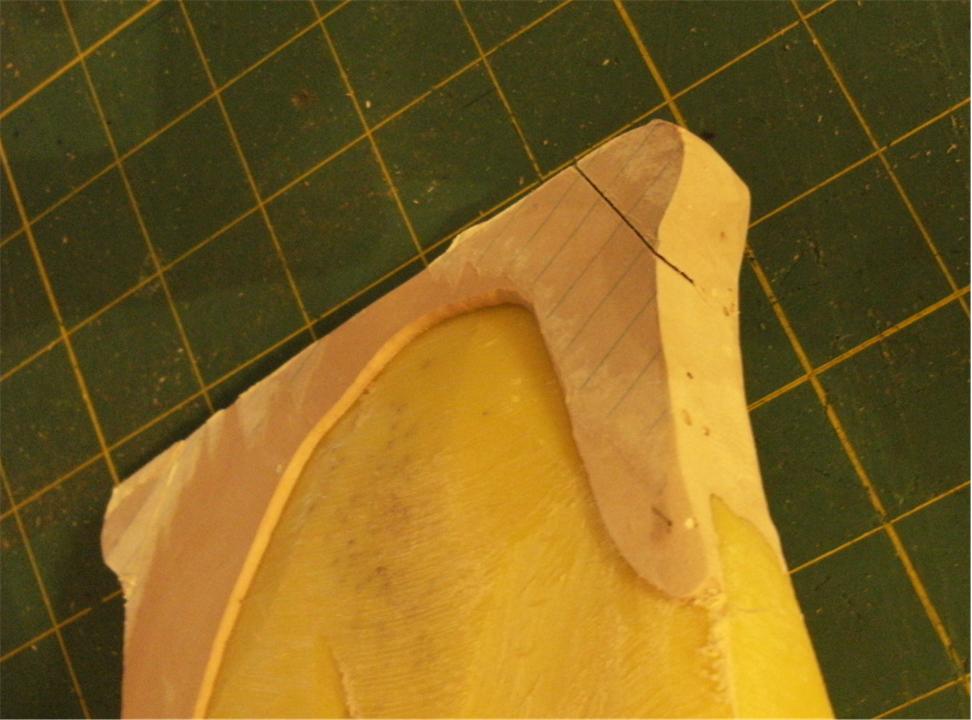
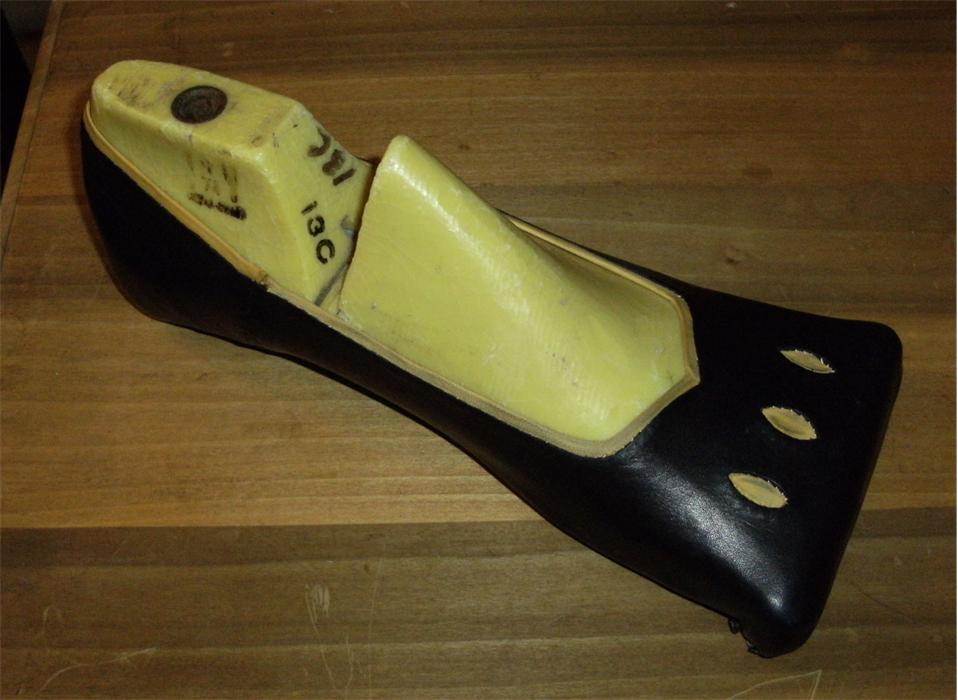
The most unique aspect of these shoes is its shape and style - as such, the last must be tailored to match. As I've said before, my focus here is primarily the shoemaking techniques and the end product - as the last is primarily a means to an end, I tend to use vintage or modern lasts and alter them to meet my needs. These modern resin lasts have had Bondo applied and sanded down in order to achieve the appropriate shape. In this case, I went for a more extreme splayed out toe than in the patterns shown above, although Goubitz does document a shoe with a toe of this style. |
 | |
Bondo is fairly sturdy and can even be nailed into. However, there may be a concern with removal of the bondo from the last. In this case, I cut part way through the "knobs" at the toe so that they might be broken off after the shoe is finished and then re-attached with epoxy or glue for future shoes. |
 | |
A shot of the cut and dyed uppers. Again, vegetable tanned cowhide was used, although the gold lozenges are of deer. Although in this shot, you see two gold lozenges and one black for each upper, I changed my mind later and ended up simply going with all three gold lozenges. |
 | |
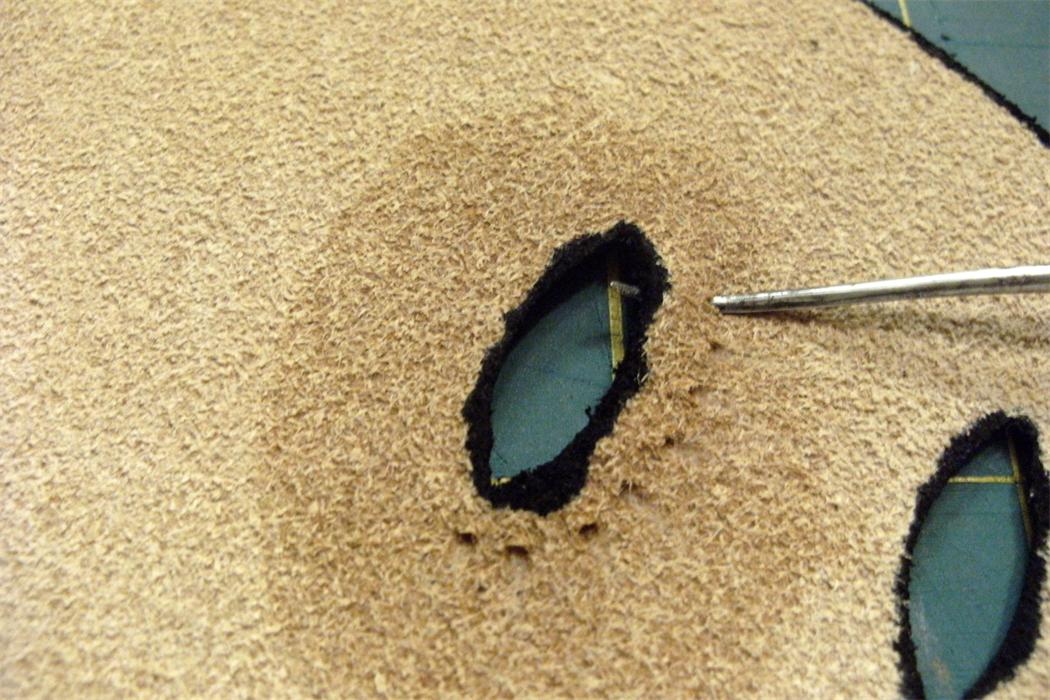
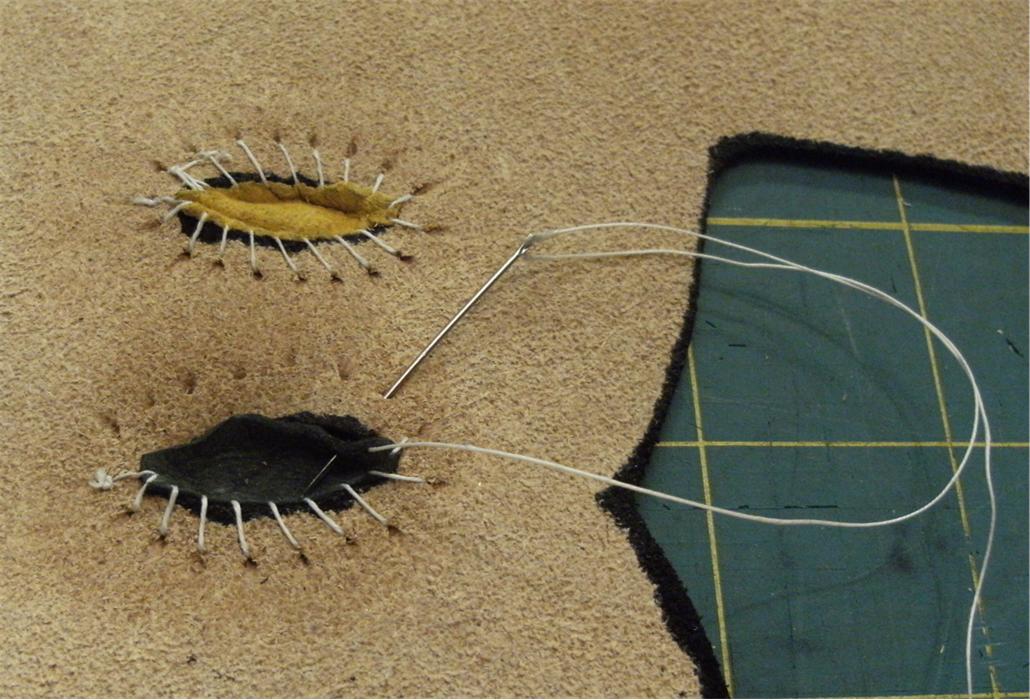
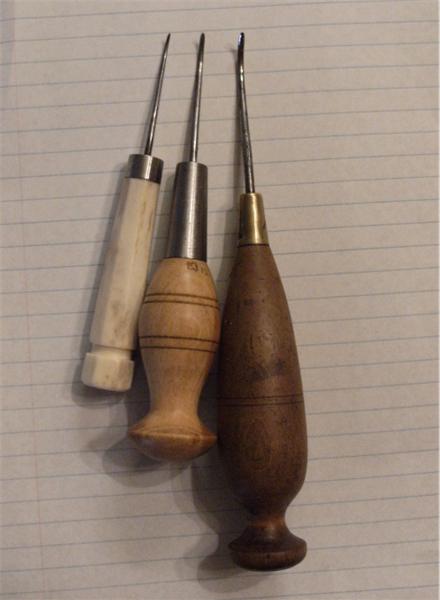
The uppers are assembled in the same manner as shown in the previous lessons using the round stitch, except that they were left with one side seam open to facilitate application of the binding strip and lozenges. This type of work is much easier when the upper is still flat. You can see that holes have been pierced through the upper at the cut edge, but in such a way so that the stitching does not appear on the outside of the upper. This shot shows the awl piercing through the upper as described. Be sure to wax your awl and wet the leather (but not too much) before you work it! A very fine awl is used to do this, as shown in this photo here. |
 | |
Once the awl holes are made, one can then tack in the leather with a needle and thread. A standard embroidery needle was used, as the eye is large enough for the linen thread (a single strand of 60/3 in this case) to be used, and sharp enough to pierce through the flexible deer leather. For bindings and decorations like this, a very thin leather is required to allow for flexibility and ease. A later picture shows the binding tacked in, but I tend to use two strands of the 60/3 for the binding. Note that a heel stiffener was also attached in the same manner as shown in the techniques section, Sewing the Heel Stiffener. |
 | |
We will fast forward to the lasted shoe, as the techniques follow directly from previous lessons. Take your time on the toes, since those are the trickiest part of the lasting process. |
 | |
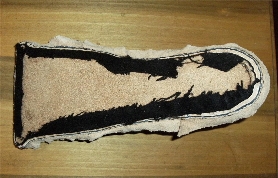
A shot of the underside of the lasted shoe. Note that I have used fewer nails than I normally would, simply because I ran out of lasting tacks and did not want to make a trip to the hardware store. Note that I've already applied both a wool sock and the insole prior to lasting, as in previous examples. You do not see the tacks holding the insole in place because I was so short that I had to remove them once I placed a few tacks around. |
 | |
A close up of the lasted knobs. Note the slits that have been cut in the upper to allow the upper to take the shape of the last properly. Although this is not as delicate as it could be, as long as you have a tight fit to your last and enough tacks to holding everything in place, it will work. Many people are very finicky about making sure the lasting process looks beautiful, and often use needle-nosed pliers inserted into the upper, twisted, and then tacked with very fine nails to lay the upper flat against the last. Although there is certainly a beauty in such an elegantly lasted shoe, I tend to feel that the shoemakers of old (at least the ones cranking these out as a means of livelihood) would go with what was quick and what worked. |
 | |
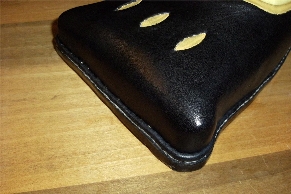
A gratuitous shot of the vamp of the lasted shoe. I was pleased to note that the dye did not significantly bleed onto the deer hide, as the deer hide is notoriously easy to get dirty. |
 | |
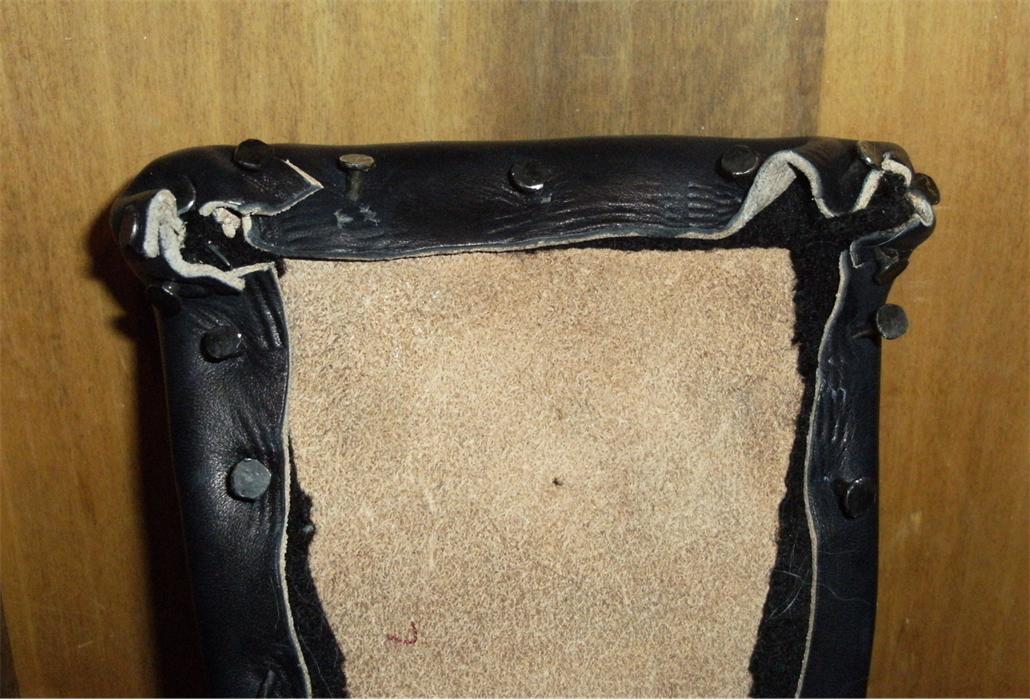
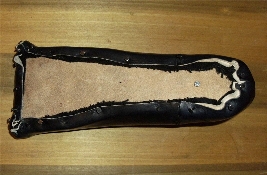
Inseaming was performed as in other lessons - for this shoe (as I have been for recent shoes) I am simply using long, straight pieces of leather for the welts. You get maximum use of the leather (an expensive raw material), it lays more easily along your upper, and when the leather is wet, it is pliable and easily folds down to have the outsole attached. You will also note that in some parts, when the excess upper was trimmed away, the sock was cut away where it would bunch and fold from going around a curve. After inseaming, remember to wet the holdfast and pound it flat with your hammer so you do not get singificant "ridges" from the inseaming process. |
 | |
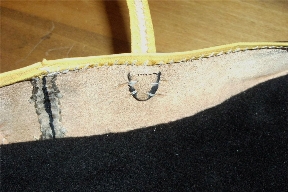
A close up of the inseaming around the knob. You can see the black shoemaker's wax being used to inseam the shoe. |
 | |
Although I hesitate to advance so quickly, the grooving and outsoling process is identical to what was described in previous lessons, as well as in the Basic Techniques section. This shows a close up of the knob portion of the outsoled shoe. Fairly heavy saddle skirting was used for the outsole, as I no longer use sole-bend on account of its rigidity and difficulty of working. You can also see some small white spots on the welt from the inseaming process as well as small amounts of residue of the wax from inseaming. After the shoe is completed, part of the finishing process involves using a thin sliver of wood (i.e. a toothpick) dipped in dye to touch up those portions. |
 | |
A shot of the underside of both shoes showing outsole and heel. The heel was pegged as in the lesson shown here. |
 | |
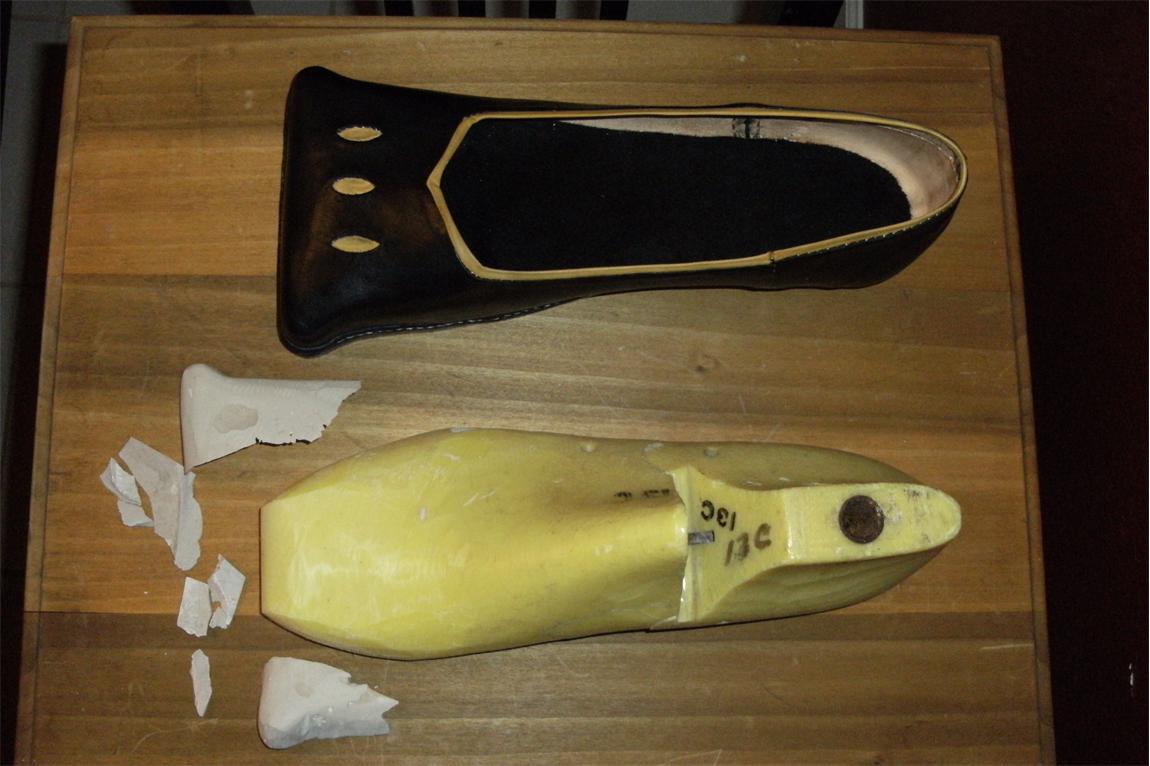
At last, the last is ready to come out. As planned, I smacked each of the knobs with a hammer, and then proceeded to take the last out. And...look what happened! The bondo probably did not have as tight of a bond to the resin last as to the wood one when I made the other boots of this style. As a result, the knobs came completely off instead of just breaking away. Live and learn! |
 | |
As if the contrasting binding wasn't enough, I decided to gild the lily a bit and put some binding on the straps as well. The final width of the band was just a touch over a quarter of an inch to get a nice trim without making the strap look too thick. This method is the same one that I used to attach the binding strip. Strictly speaking, binding strips weren't really done in this manner. There were actually a number of different manners in which they could be attached, such as making another set of holes to tack the binding down or sewing the folded strip all at once. For my next pair, I plan to try the latter technique since it combines two operations into one, and the former requires yet another layer of stitching holes. |
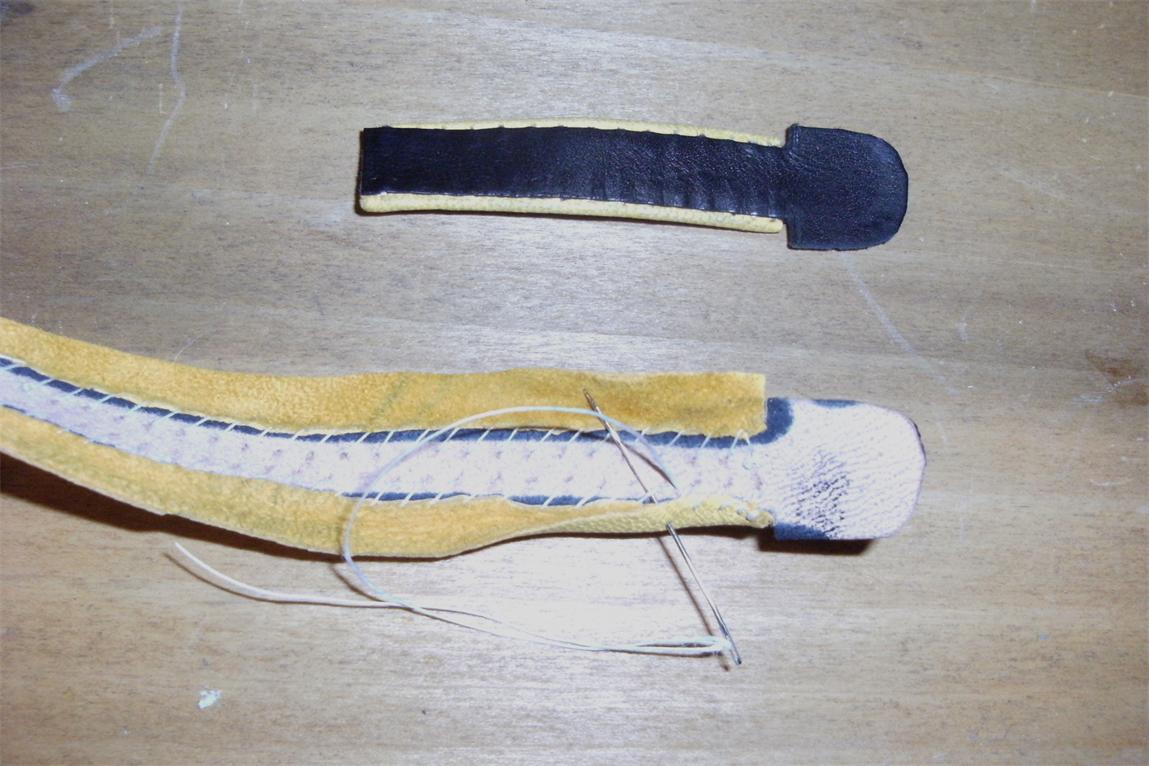 | |
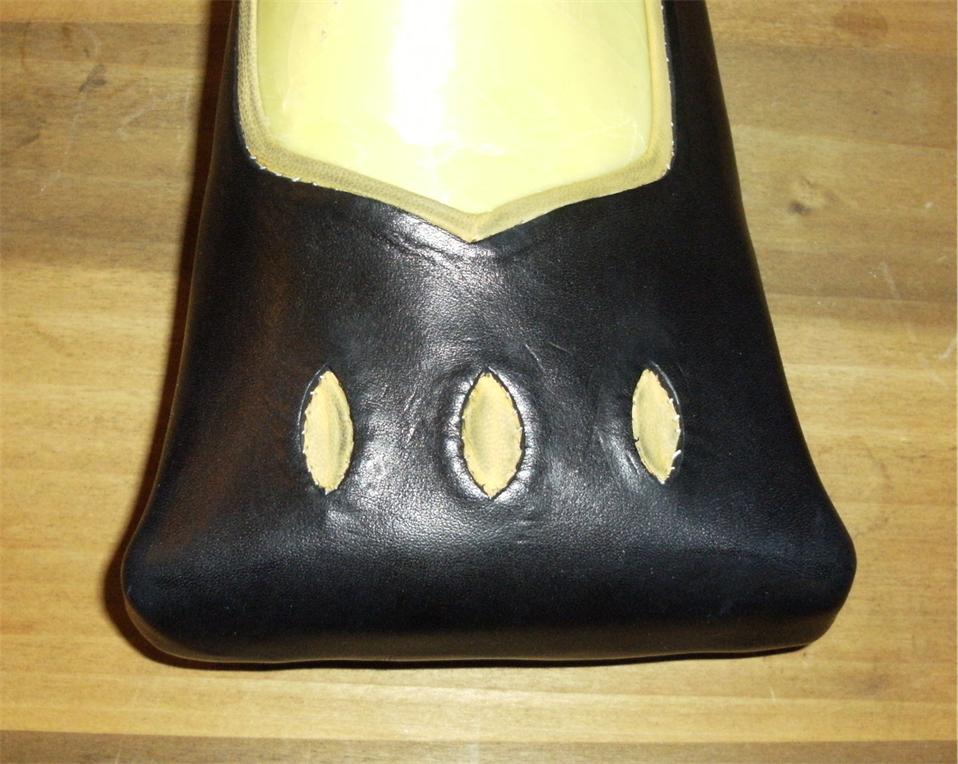
A narrow horizontal slit (narrower than the "base" part of the strap was cut into the upper and then the finished strap was pulled through and tacked in with a few stitches. The stitches only do part of the work keeping the strap in place - the majority of the help comes from the thicker base of the strap which cannot pass back through the slit. |
 | |
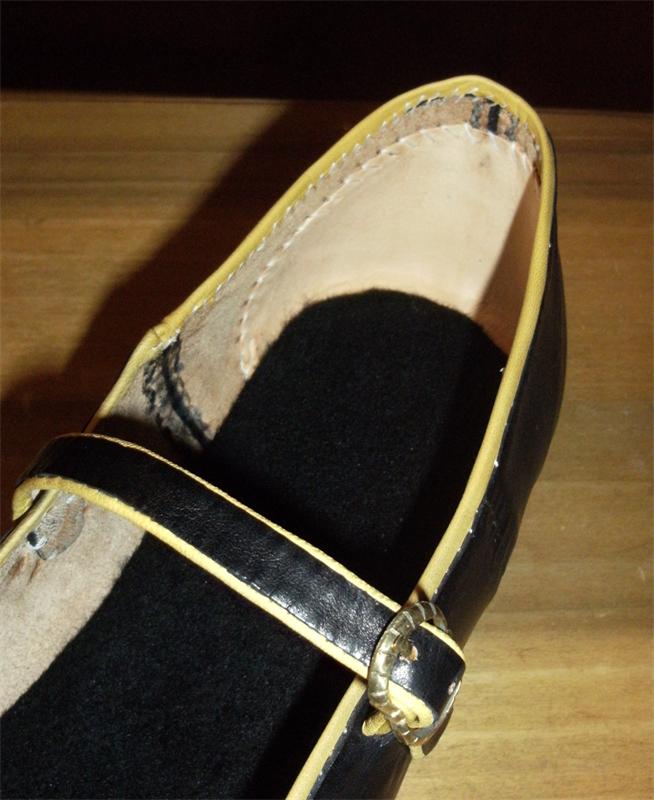
A shot of the strapped shoe. The buckles were puchased from Revival.us, but they requires some filing down to take the mold burrs off so that they wouldn't catch and scrape the straps. |
 | |
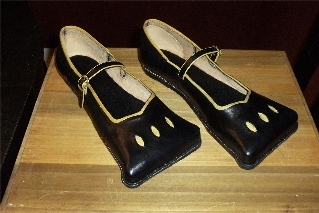
The finished shoes! Note that after this photo was taken, I touched up the imperfections on the front of the shoes and boxed them up. |
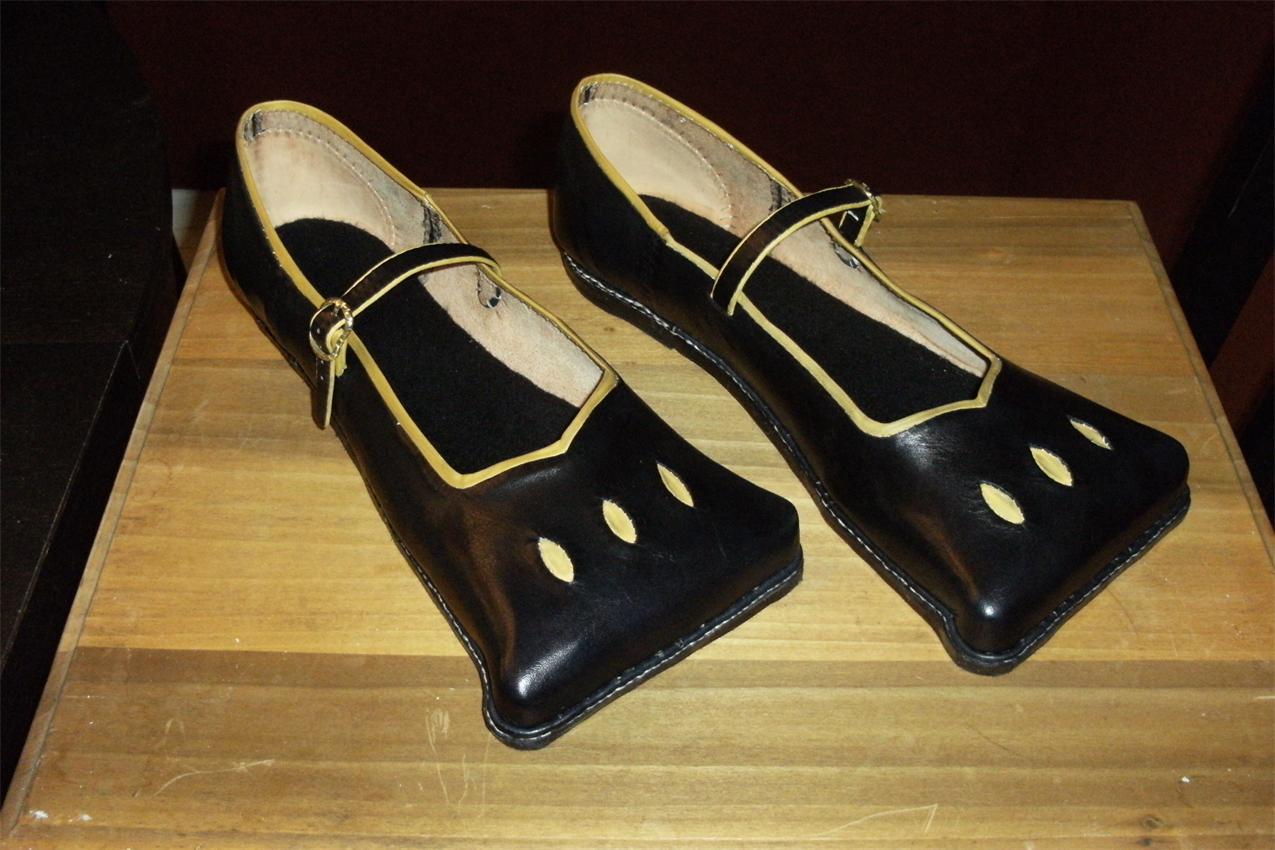 | |
Another shot of the finished shoes. Overall, I'm pretty pleased with the way that they came out. |
 | |